
Enabling and validating additional checksums on existing objects in Amazon S3 | Amazon Web Services
Verifying data integrity during a data migration or data transfer is a data durability best practice that ensures your data is error-free and not corrupt as it reaches its destination. One way to verify the integrity of your data is through checksums, whic
aws.amazon.com
이 글은 상단의 아마존 블로그 내용을 기반으로 공부하며 작성되었습니다.
체크섬(checksum)은 데이터의 무결성을 검사하기 위해 사용되는 값으로, 주로 전송된 데이터가 오류 없이 올바르게 도착했는지 확인하는 데 사용됩니다. 오늘날 업계에서는 알고리즘을 사용하여 파일을 바이트 단위로 검사하여 파일에 대한 고유한 지문을 생성하기 위해 사용됩니다.
실습
Part 1: Amazon S3에 기존 객체에 체크섬 추가하기
Part 1a: 환경 설정
체크섬 추가를 위한 환경 셋팅을 위해 aws cli를 활용하여 S3 버킷을 생성하고 object를 업로드 하였습니다.
1. S3 버킷 생성
# AWS Management Consle
a. Sign in to the AWS Management Console and access the S3 console.
b. Then, select Create bucket.
c. In the Bucket name box of the General configuration section, type a bucket name.
-
- The bucket name you choose must be unique among all existing bucket names in Amazon S3. One way to help ensure uniqueness is to prefix your bucket names with the name of your organization. Bucket names must comply with certain rules. For more information, view the bucket restrictions and limitations in the Amazon S3 user guide.
d. Select an AWS Region.
e. Navigate down the page and keep all other default selections as they are.
f. Choose the Create bucket button. When Amazon S3 successfully creates your bucket, the console displays your empty bucket in the Buckets panel.
aws s3 mb s3://checksum-test-naa0 --profile nyk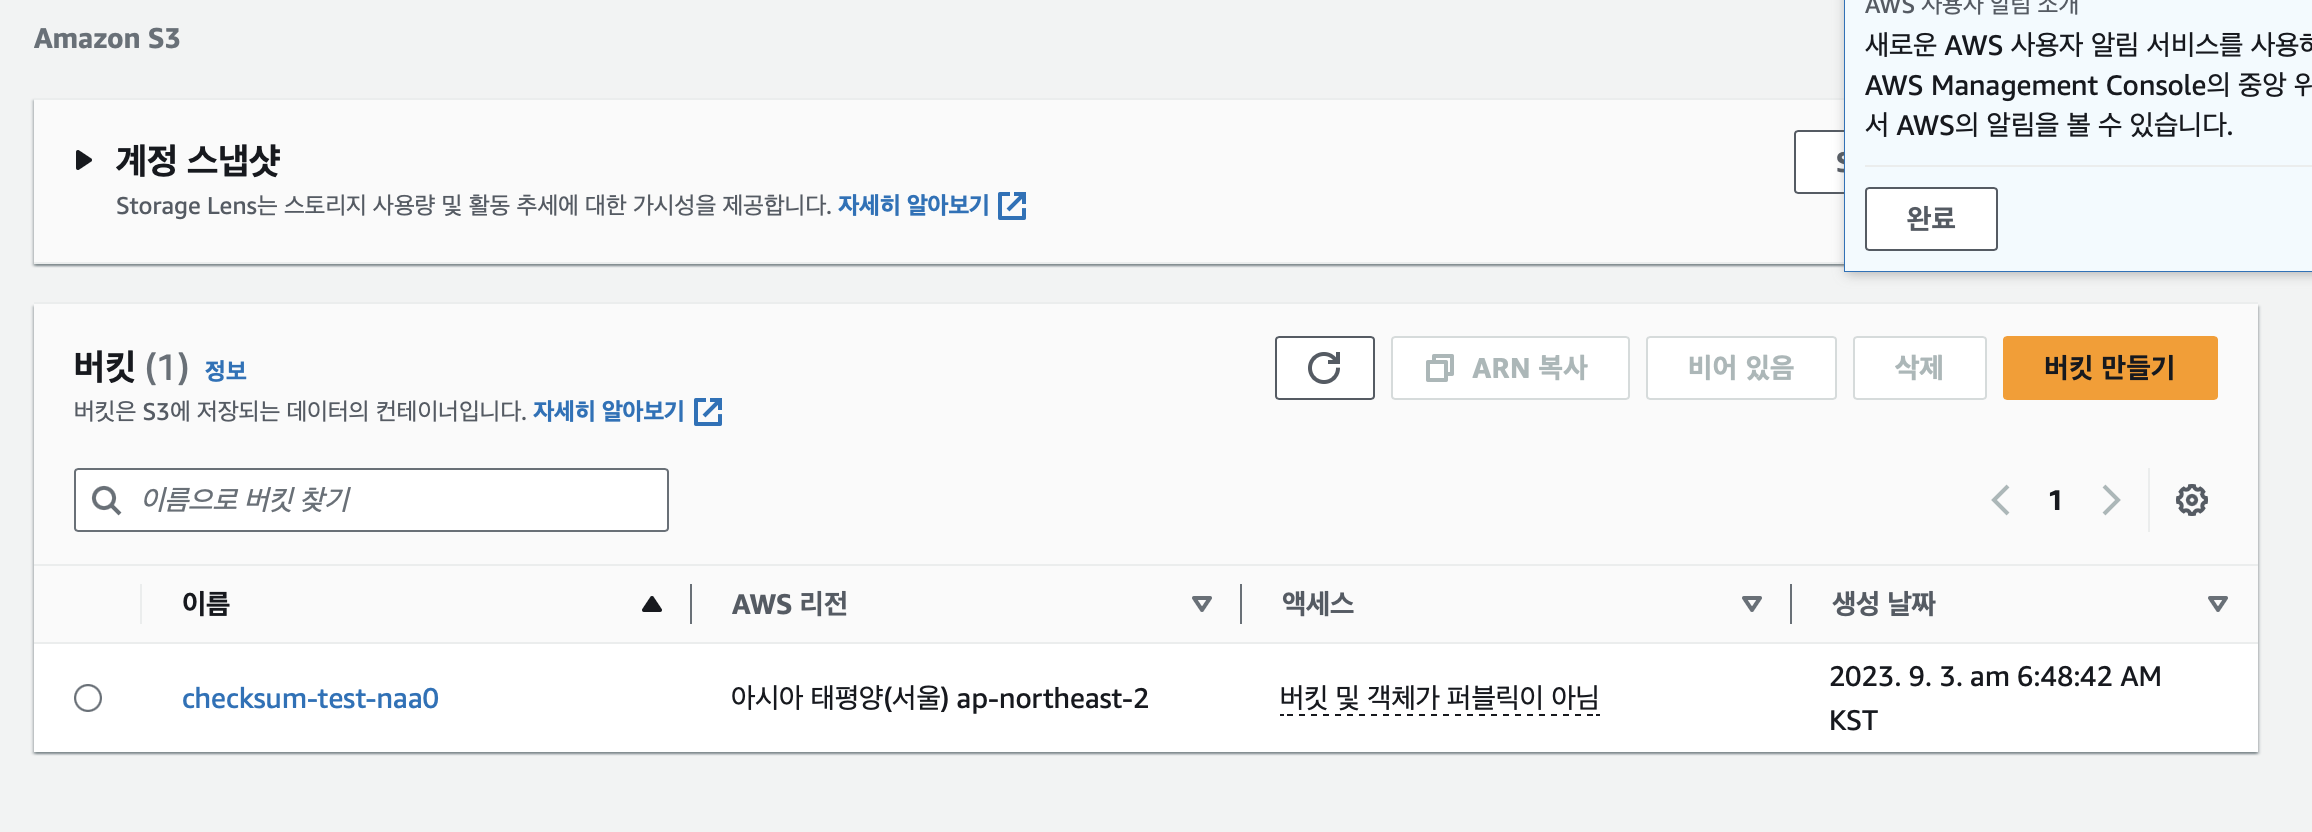
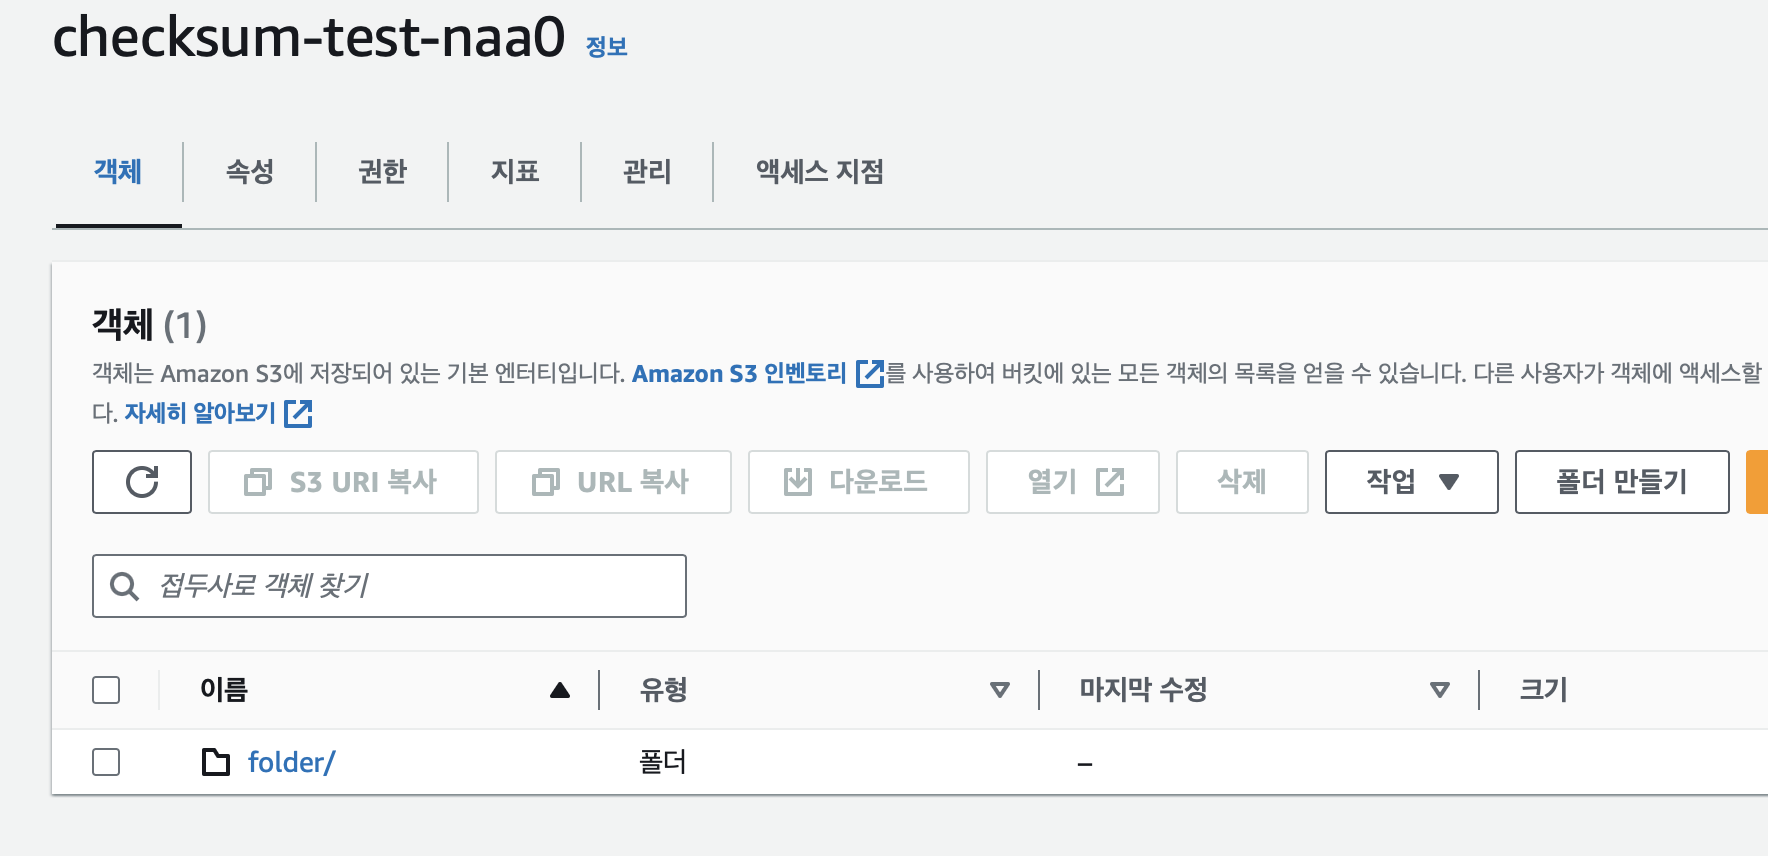
2. 폴더 생성
# AWS Management Consle
a. In the Buckets section, choose the name of the new bucket that you just created.
b. Then, in the Objects section, select the Create folder.
c. In the Folder section, in the Folder name area, name the new folder data.
d. Keep the Server-side encryption selection as Amazon S3-managed keys (SSE-S3) and then select Create folder.
% aws s3api put-object --bucket checksum-test-naa0 --key folder/ --profile nyk{
"ETag": "\"d41d8cd98f00b204e9800998ecf8427e\"",
"ServerSideEncryption": "AES256"
}
3. 파일 업로드
# AWS Management Consle
a. In the Objects section, Select the Name of the data folder.
b. Then, select the Upload button.
c. On the Upload page select the Add files.
d. Follow the Amazon S3 console instructions to upload local files.
e. Once files have been uploaded, choose the Upload button.
f. You will then see that an Upload: status page indicating if your upload has been completed successfully. If your upload succeeded, select the Close button.
우선 임의로 로컬 경로에 temp.txt라는 파일을 만들어 주었습니다.

% aws s3 cp temp.txt s3://checksum-test-naa0/folder/ --profile nykupload: ./temp.txt to s3://checksum-test-naa0/folder/temp.txt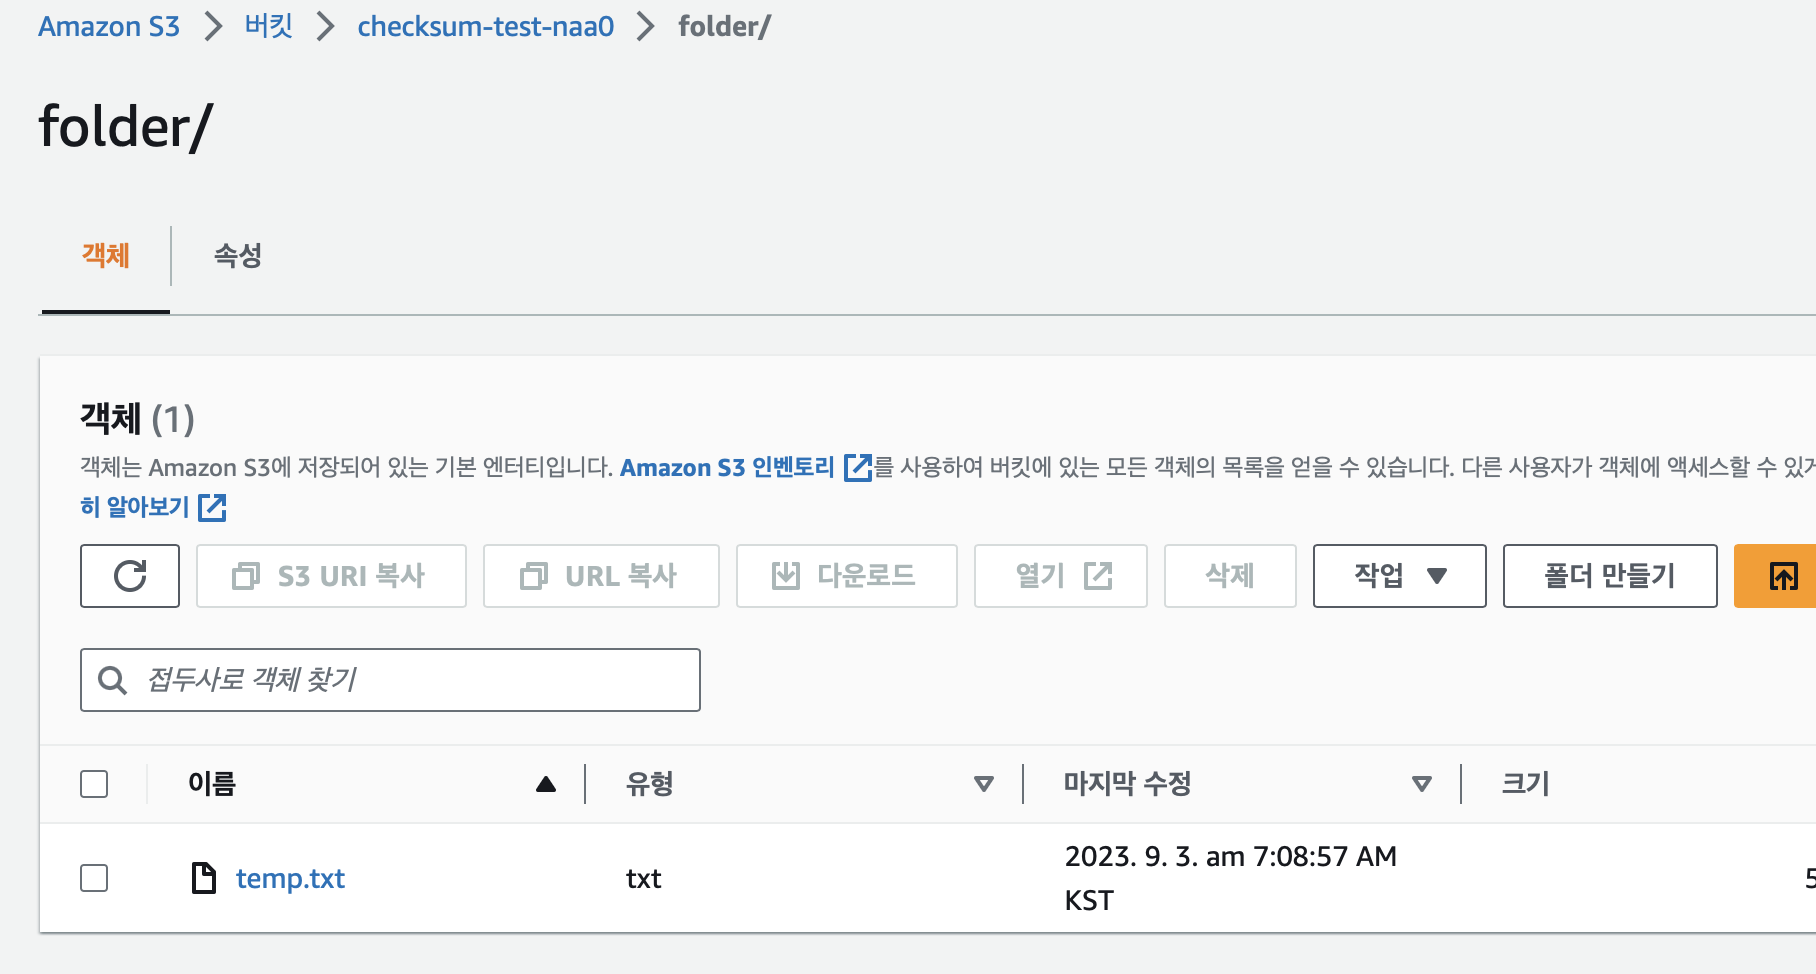
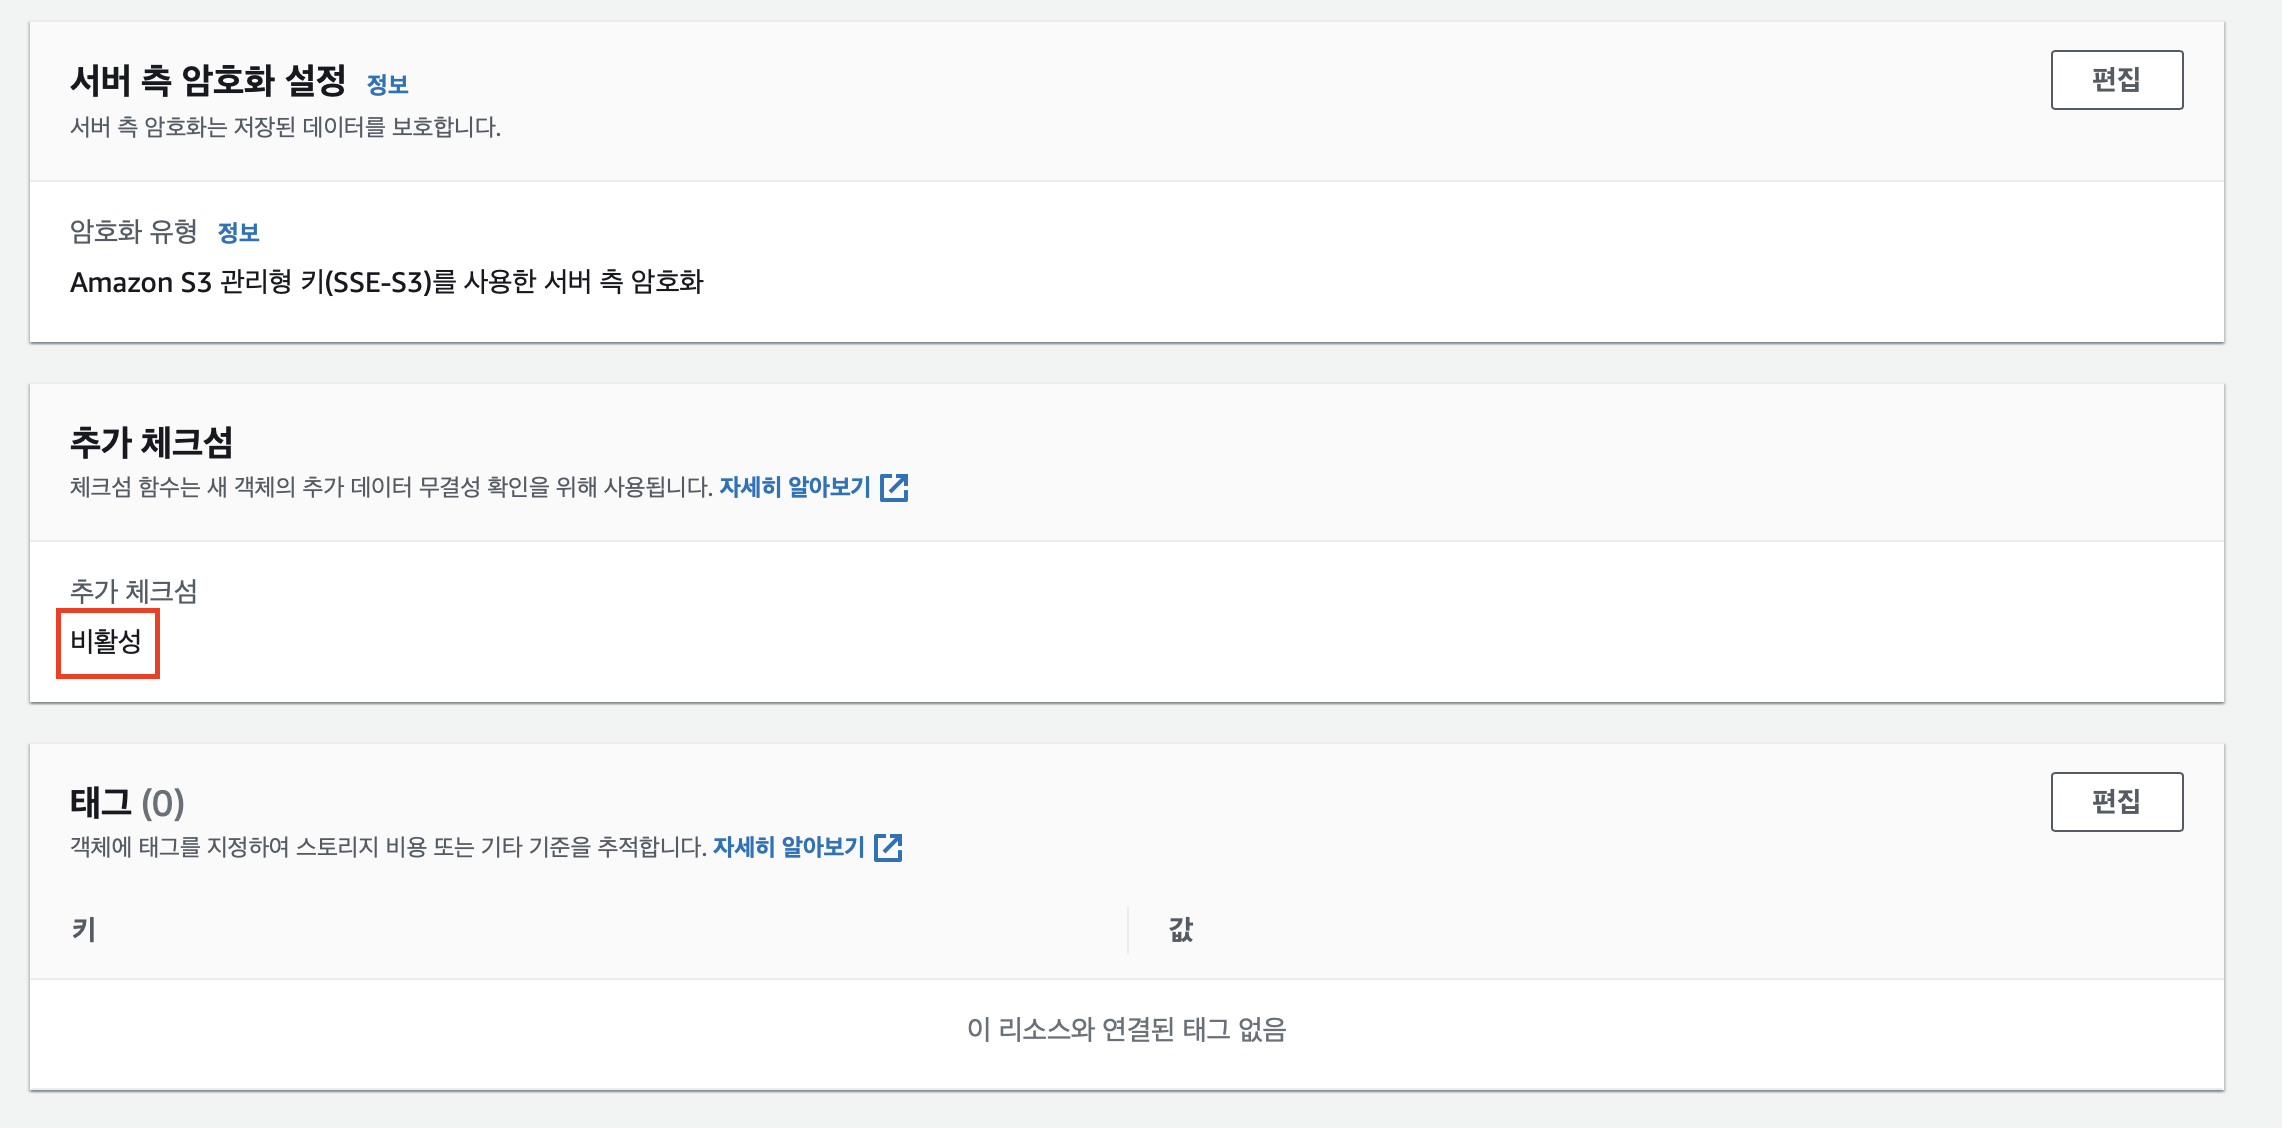
이 temp.txt 파일을 클릭하여 속성을 보면, 아래와 같이 추가 체크섬이 현재까지는 비활성 상태임을 알 수 있습니다.
Part 1b: 기존 object에 checksum 붙이기
그럼 본격적으로 해당 데이터 파일에 checksum을 추가하는 실습을 진행해 보겠습니다.
git clone https://github.com/aws-samples/amazon-s3-checksum-verification
cd amazon-s3-checksum-verification
위 깃허브 코드를 로컬 컴퓨터로 클론받으면, "s3-checksum.yaml"이라는 파일이 나옵니다.
- AWS CloudFormation 스택 설명서 : https://docs.aws.amazon.com/AWSCloudFormation/latest/UserGuide/cfn-console-create-stack.html
Creating a stack on the AWS CloudFormation console - AWS CloudFormation
Thanks for letting us know this page needs work. We're sorry we let you down. If you've got a moment, please tell us how we can make the documentation better.
docs.aws.amazon.com
- AWS CloudFormation 스택 콘솔 : https://ap-southeast-2.console.aws.amazon.com/cloudformation/home?region=ap-southeast-2#/stacks?filteringText=&filteringStatus=active&viewNested=true
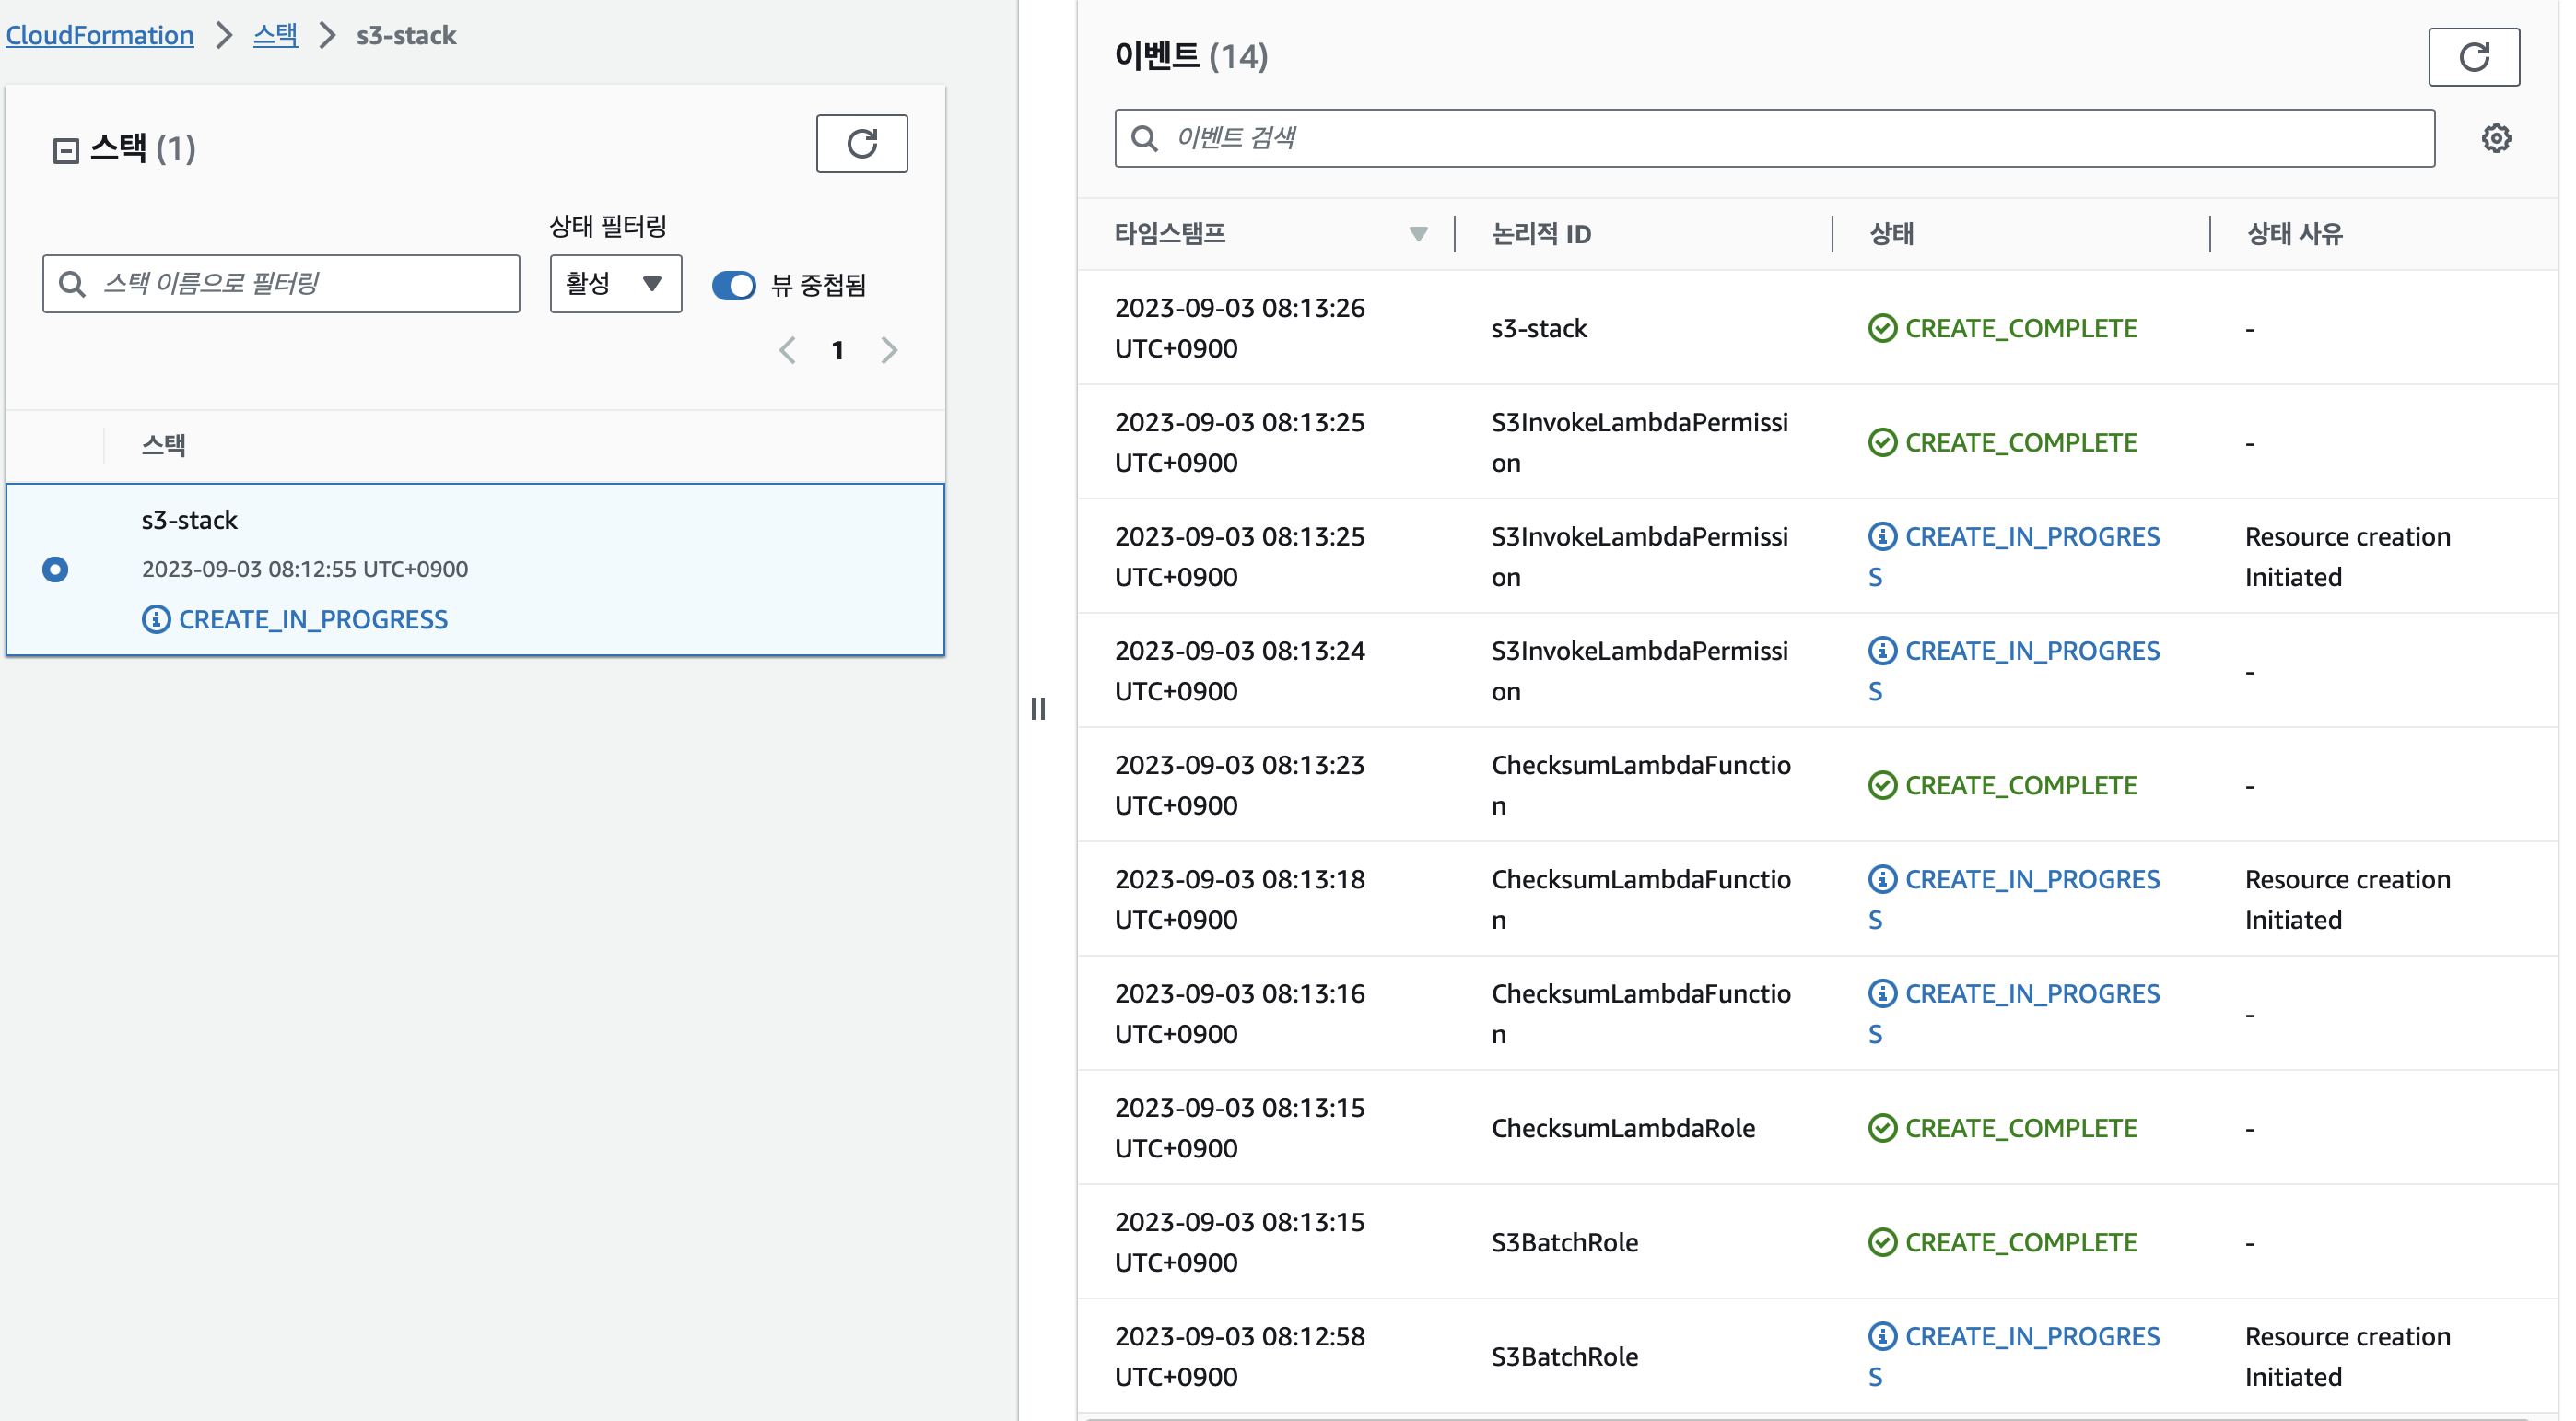
위 링크는 AWS CloudFormation 스택의 설명서이고, 이 설명서를 따라하면 아래의 AWS CloudFormation 콘솔로 이동하게 됩니다. "스택 매개변수 지정" 섹션에 도달하면 버킷에 지정한 이름을 S3Bucket 매개변수에 입력합니다.
우선, 위에서 받은 깃허브에서 yaml 파일을 확인해줍니다.

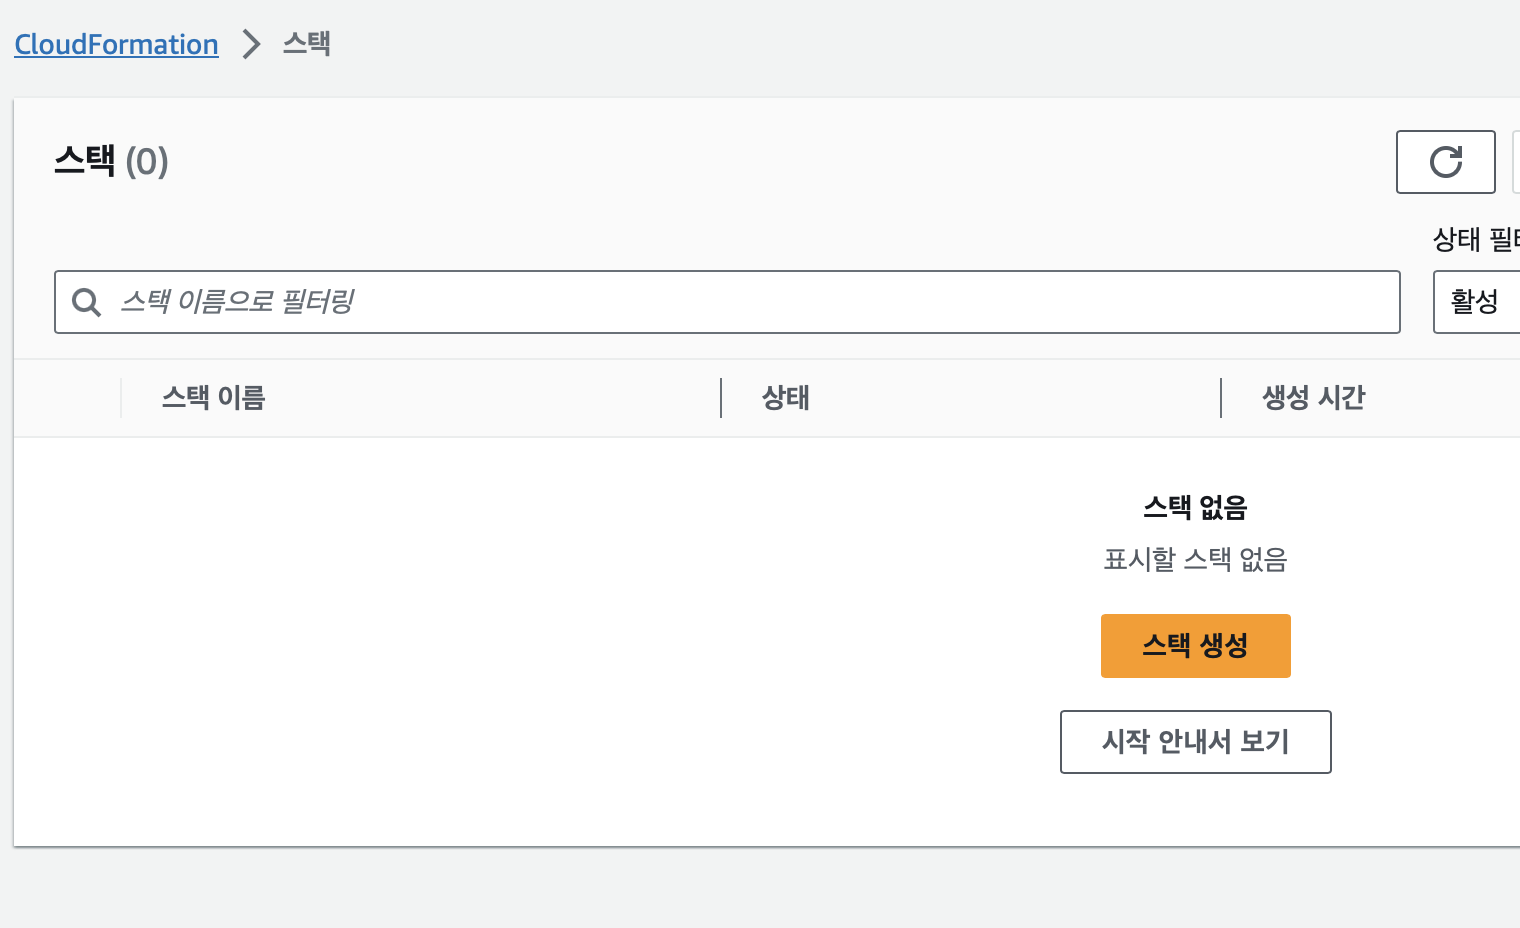
다시, cloudformation 스택으로 돌아가서 아래의 화면에서 스택생성을 눌러줍니다.
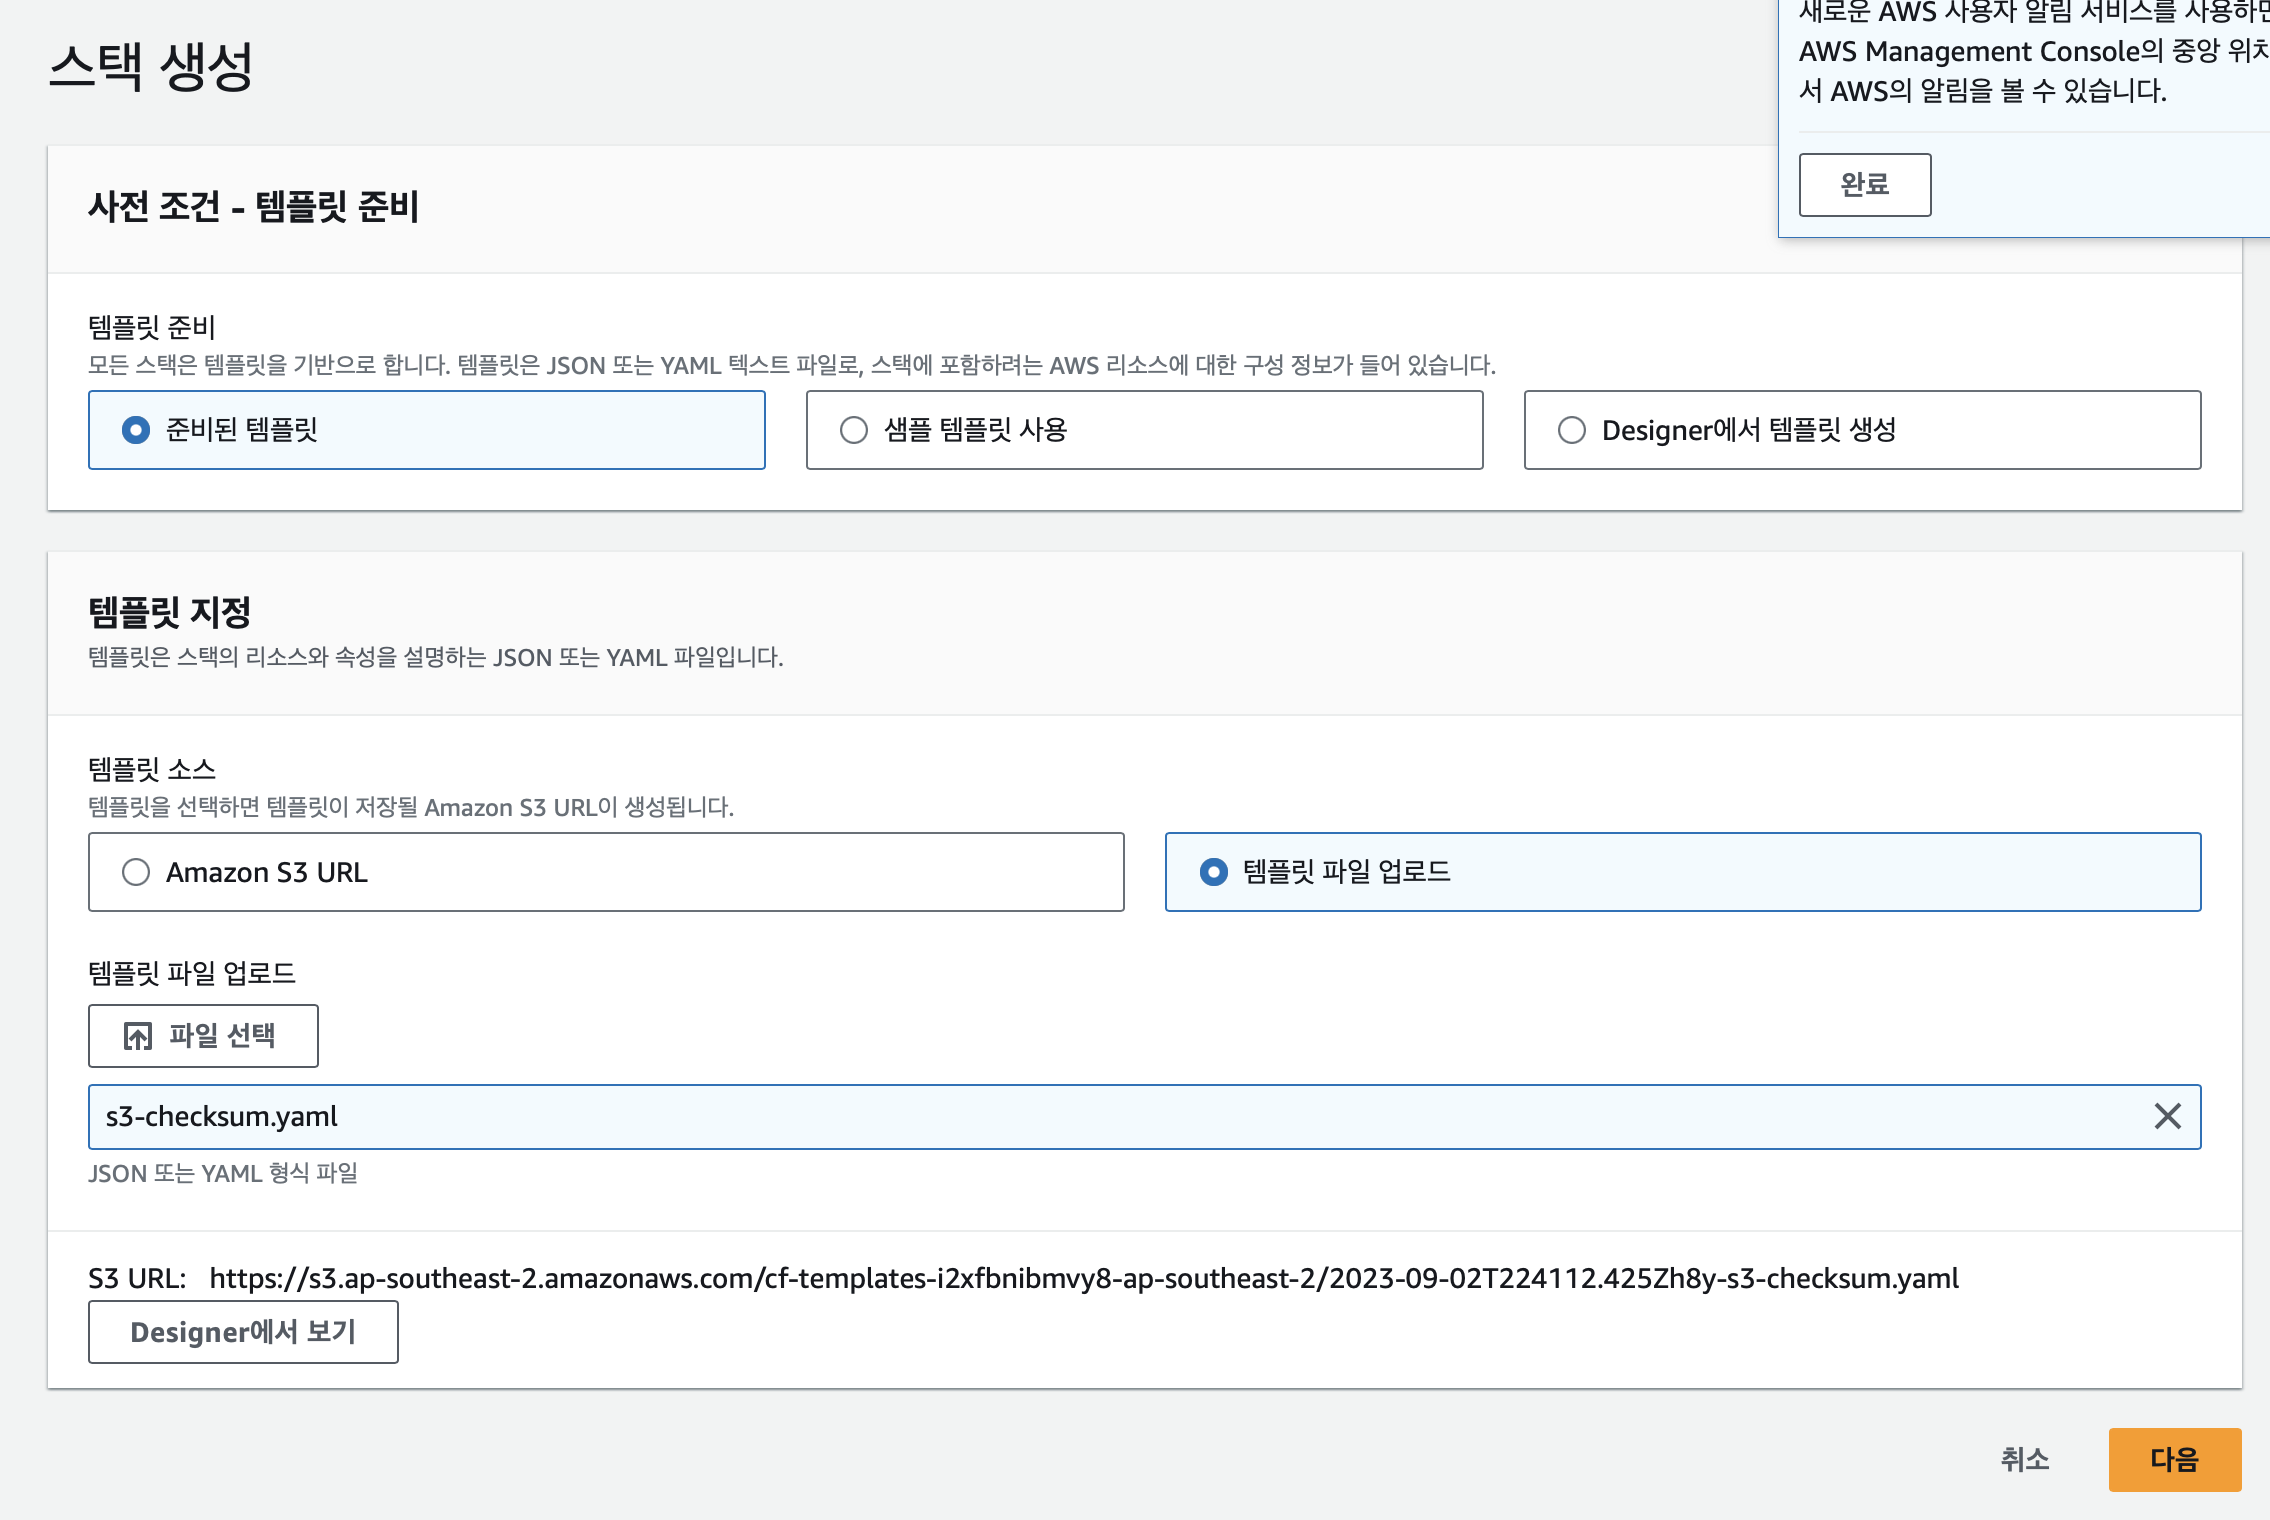
준비된 템플릿에서 해당 yaml 파일을 업로드 해주고, 다음을 클릭합니다.
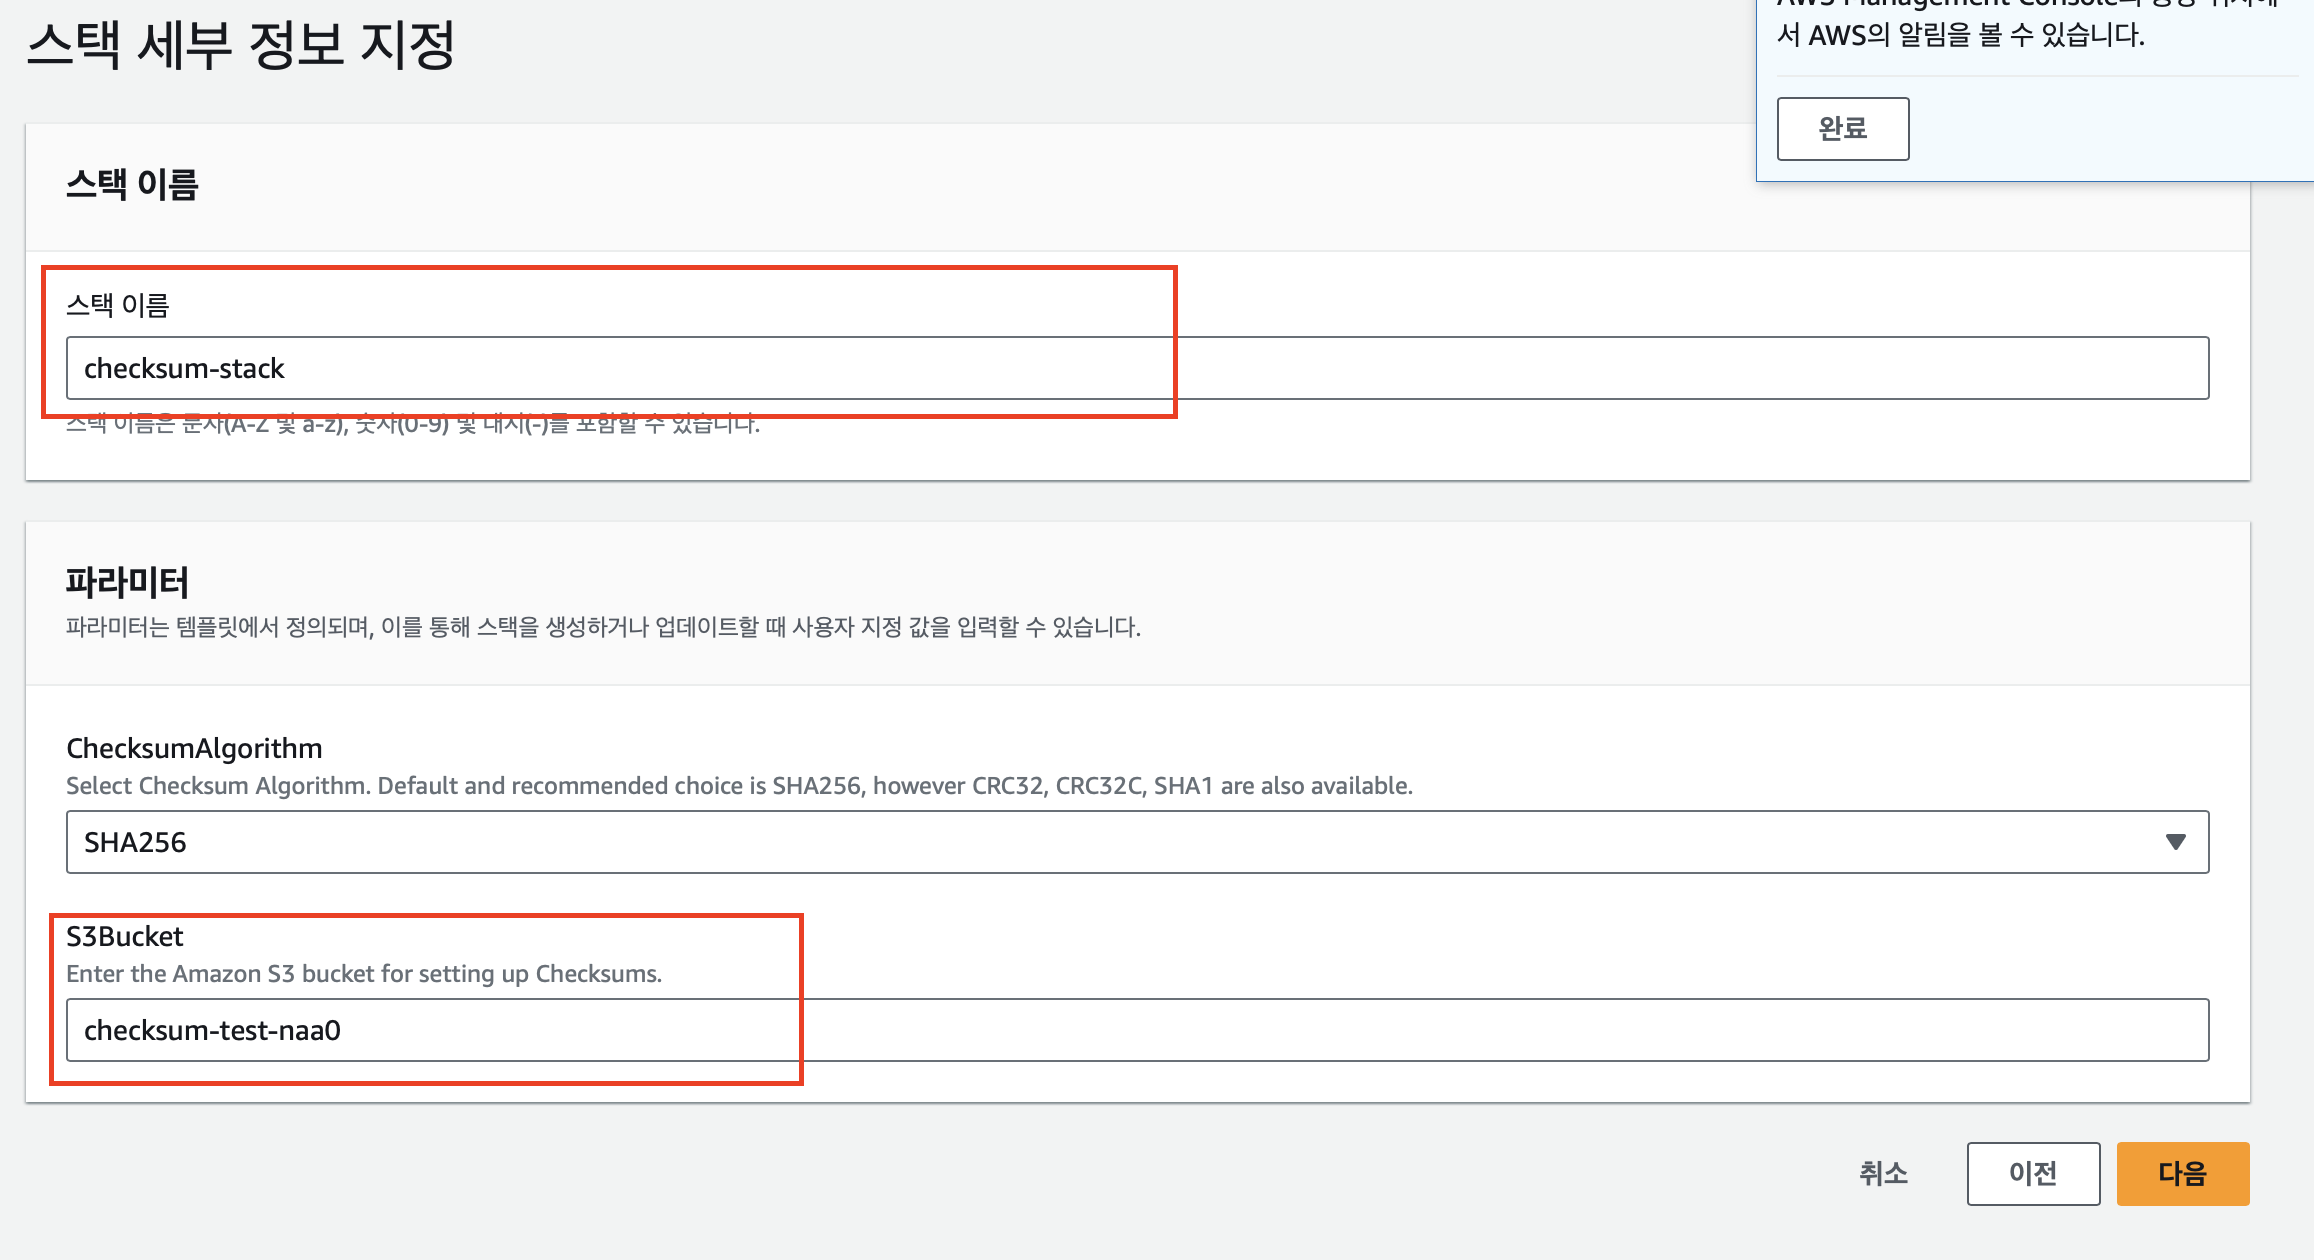
스택이름은 대강 지정하고, "Parameters" 섹션에서 "S3Bucket" 필드에 checksum-test-naa0을 입력합니다. (s3:// 프리픽스는 제외합니다.)
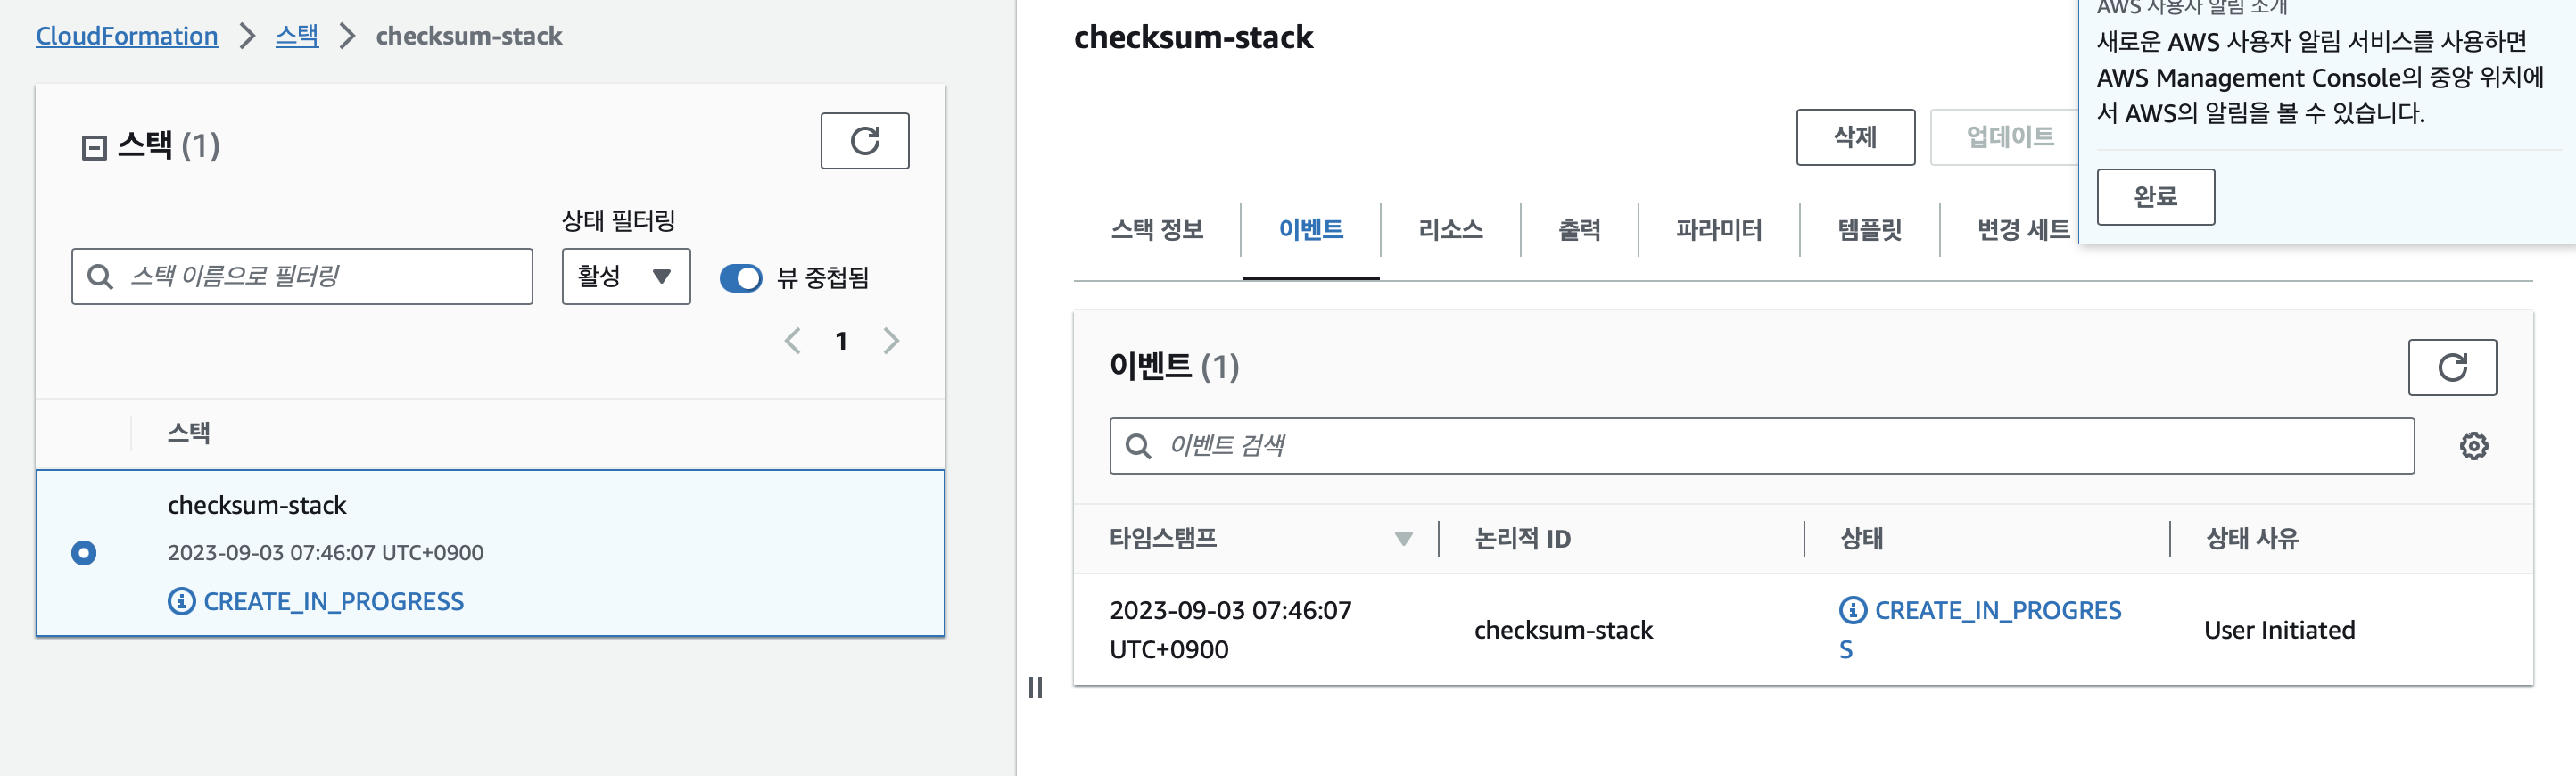
그 이후 모두 다음을 눌러 생성을 완료합니다.
# cloudformation stack 오류
Resource handler returned message: "Specified ReservedConcurrentExecutions for function decreases account's UnreservedConcurrentExecution below its minimum value of [10]. (Service: Lambda, Status Code: 400, Request ID: b0034703-844e-47f9-9e74-8dbca7cec024)" (RequestToken: cbe58882-3edc-5be6-63e6-512fa295b202, HandlerErrorCode: InvalidRequest)
추정원인1 : 람다 함수에 설정된 ReservedConcurrentExecutions의 값이 AWS 계정의 사용 가능한 동시 실행 (UnreservedConcurrentExecution)의 최소 값인 10보다 낮게 설정되어 있기 때문에 CloudFormation 스택 생성이 실패한 것이라, s3-checksum.yaml 파일에서 ChecksumLambdaFunction 리소스의 ReservedConcurrentExecutions 속성 값을 조정하면 됩니다.해결1 : 값을 1000으로 늘림 (X)
해결2 : 아예 yaml에서 parameter를 지움 (O)
이후, 아래와 같이 key, value 값을 갖는 csv 파일을 만들어 버킷에 업로드 해줍니다.
Examplebucket,objectkey1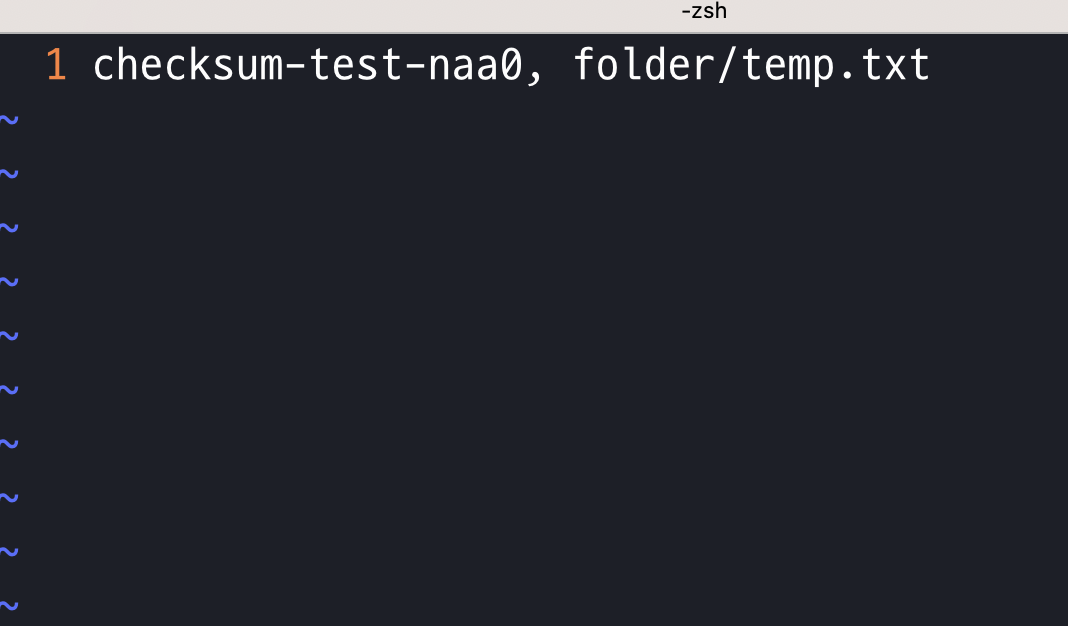
그런다음, 버킷의 루트 경로에 해당 파일을 업로드 해줍니다.
% aws s3 cp temp.csv s3://checksum-test-naa0/ --profile nyk
upload: ./temp.csv to s3://checksum-test-naa0/temp.csv
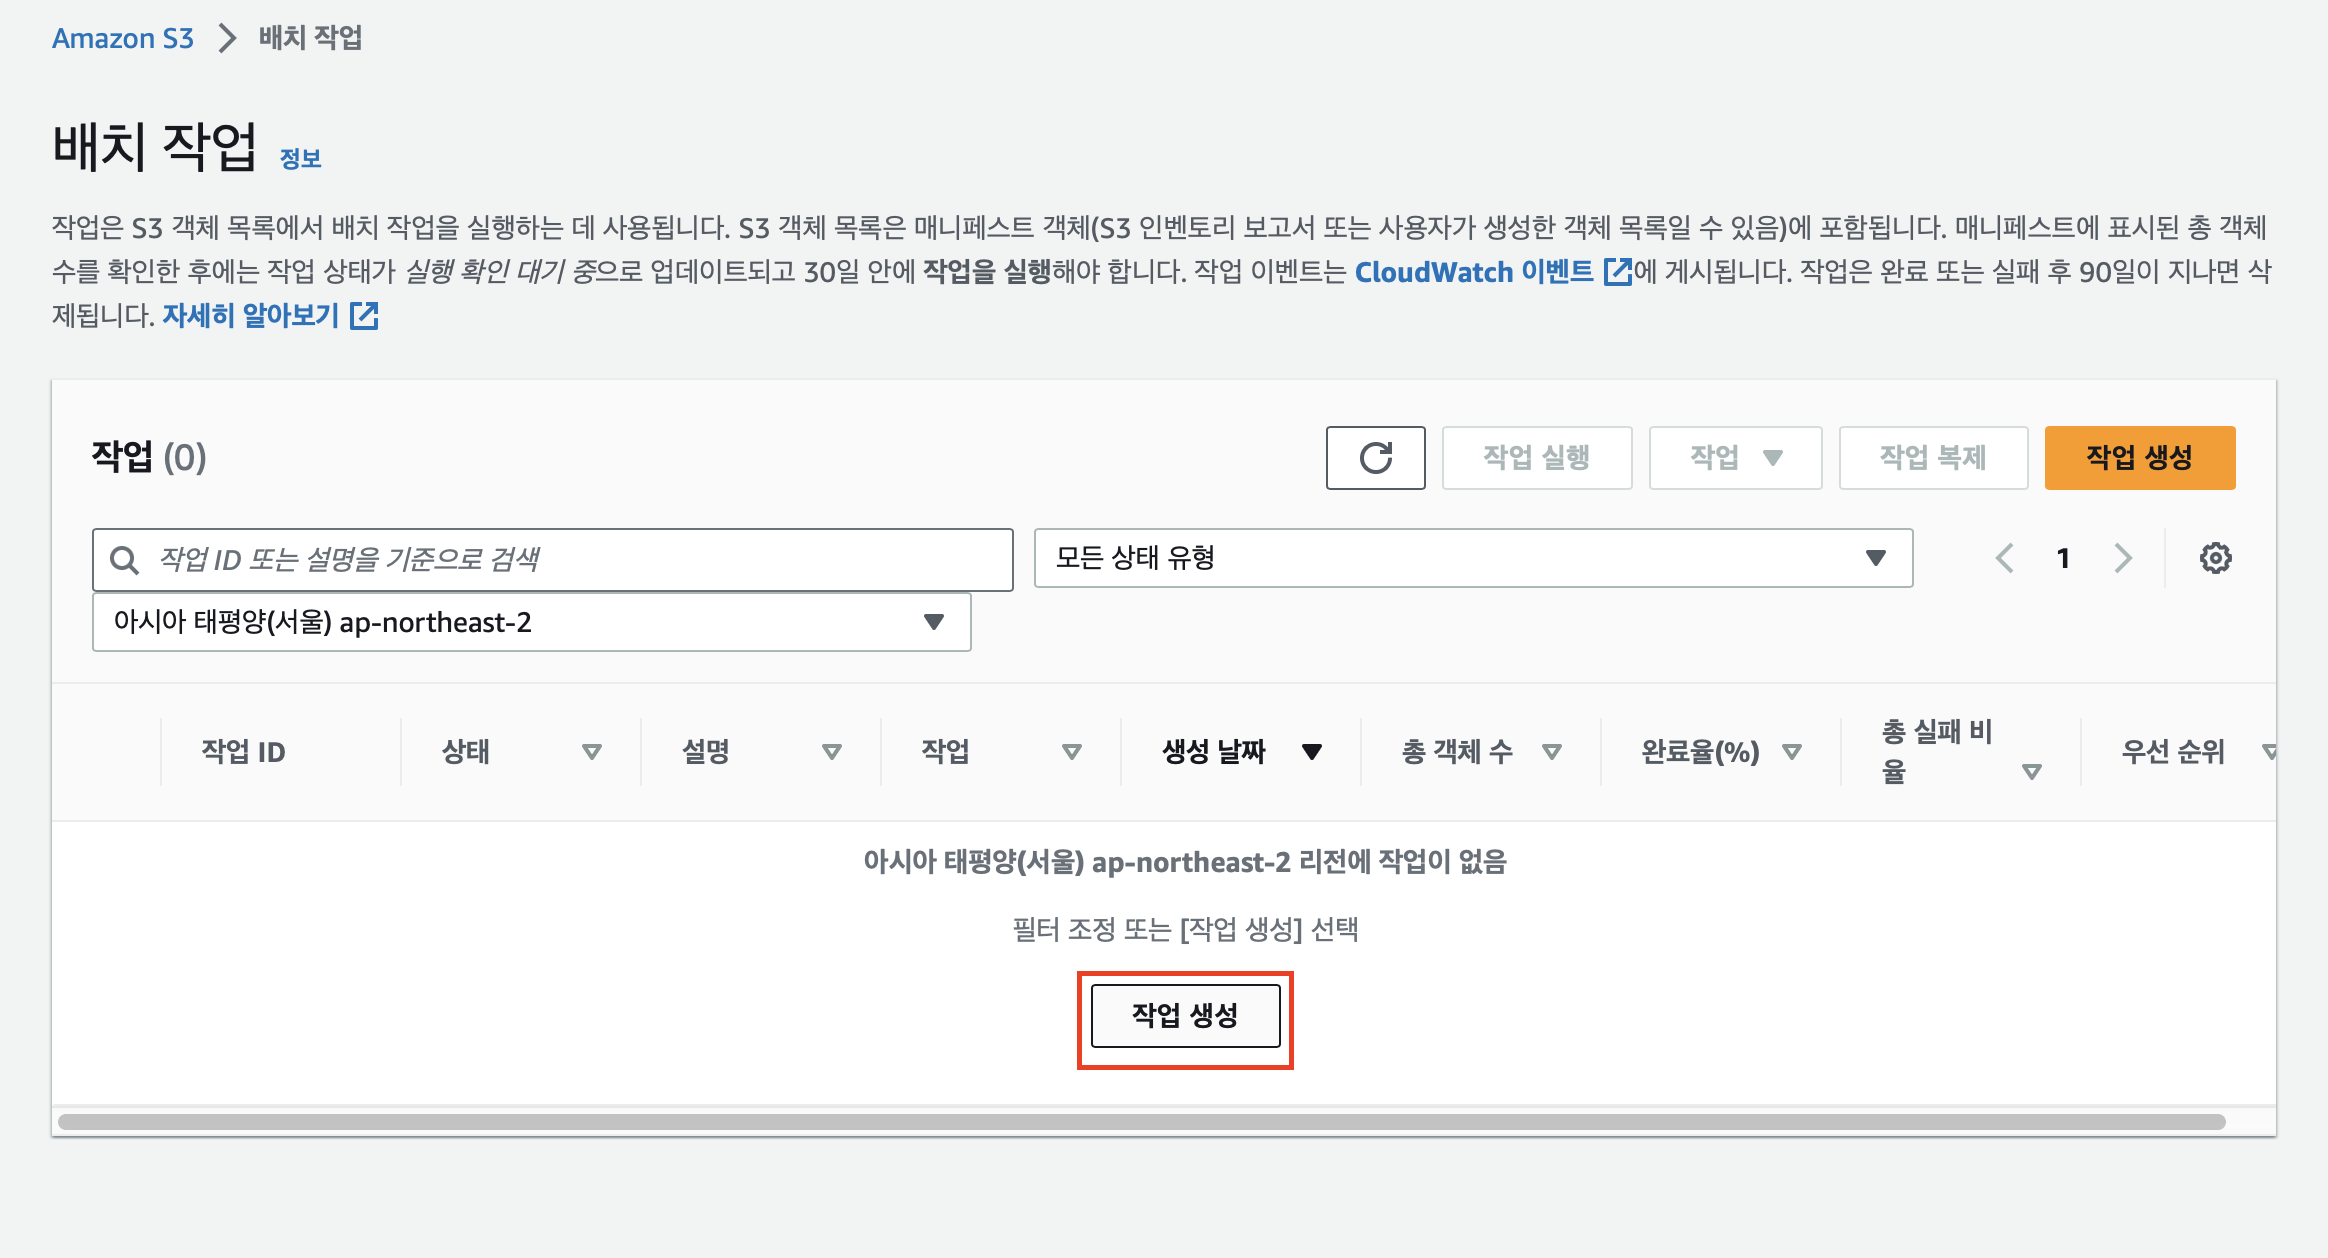
S3 왼쪽 패널에는 '배치작업' 이라는 메뉴가 있습니다. 이제 이걸 클릭해줍니다.
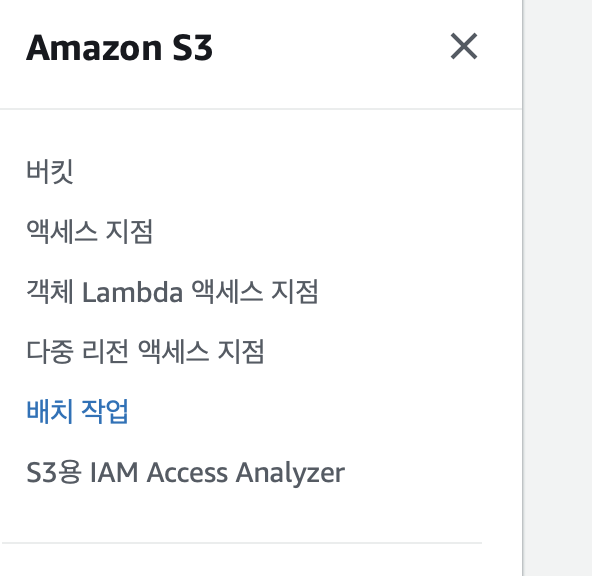
작업 생성을 눌러 줍니다.
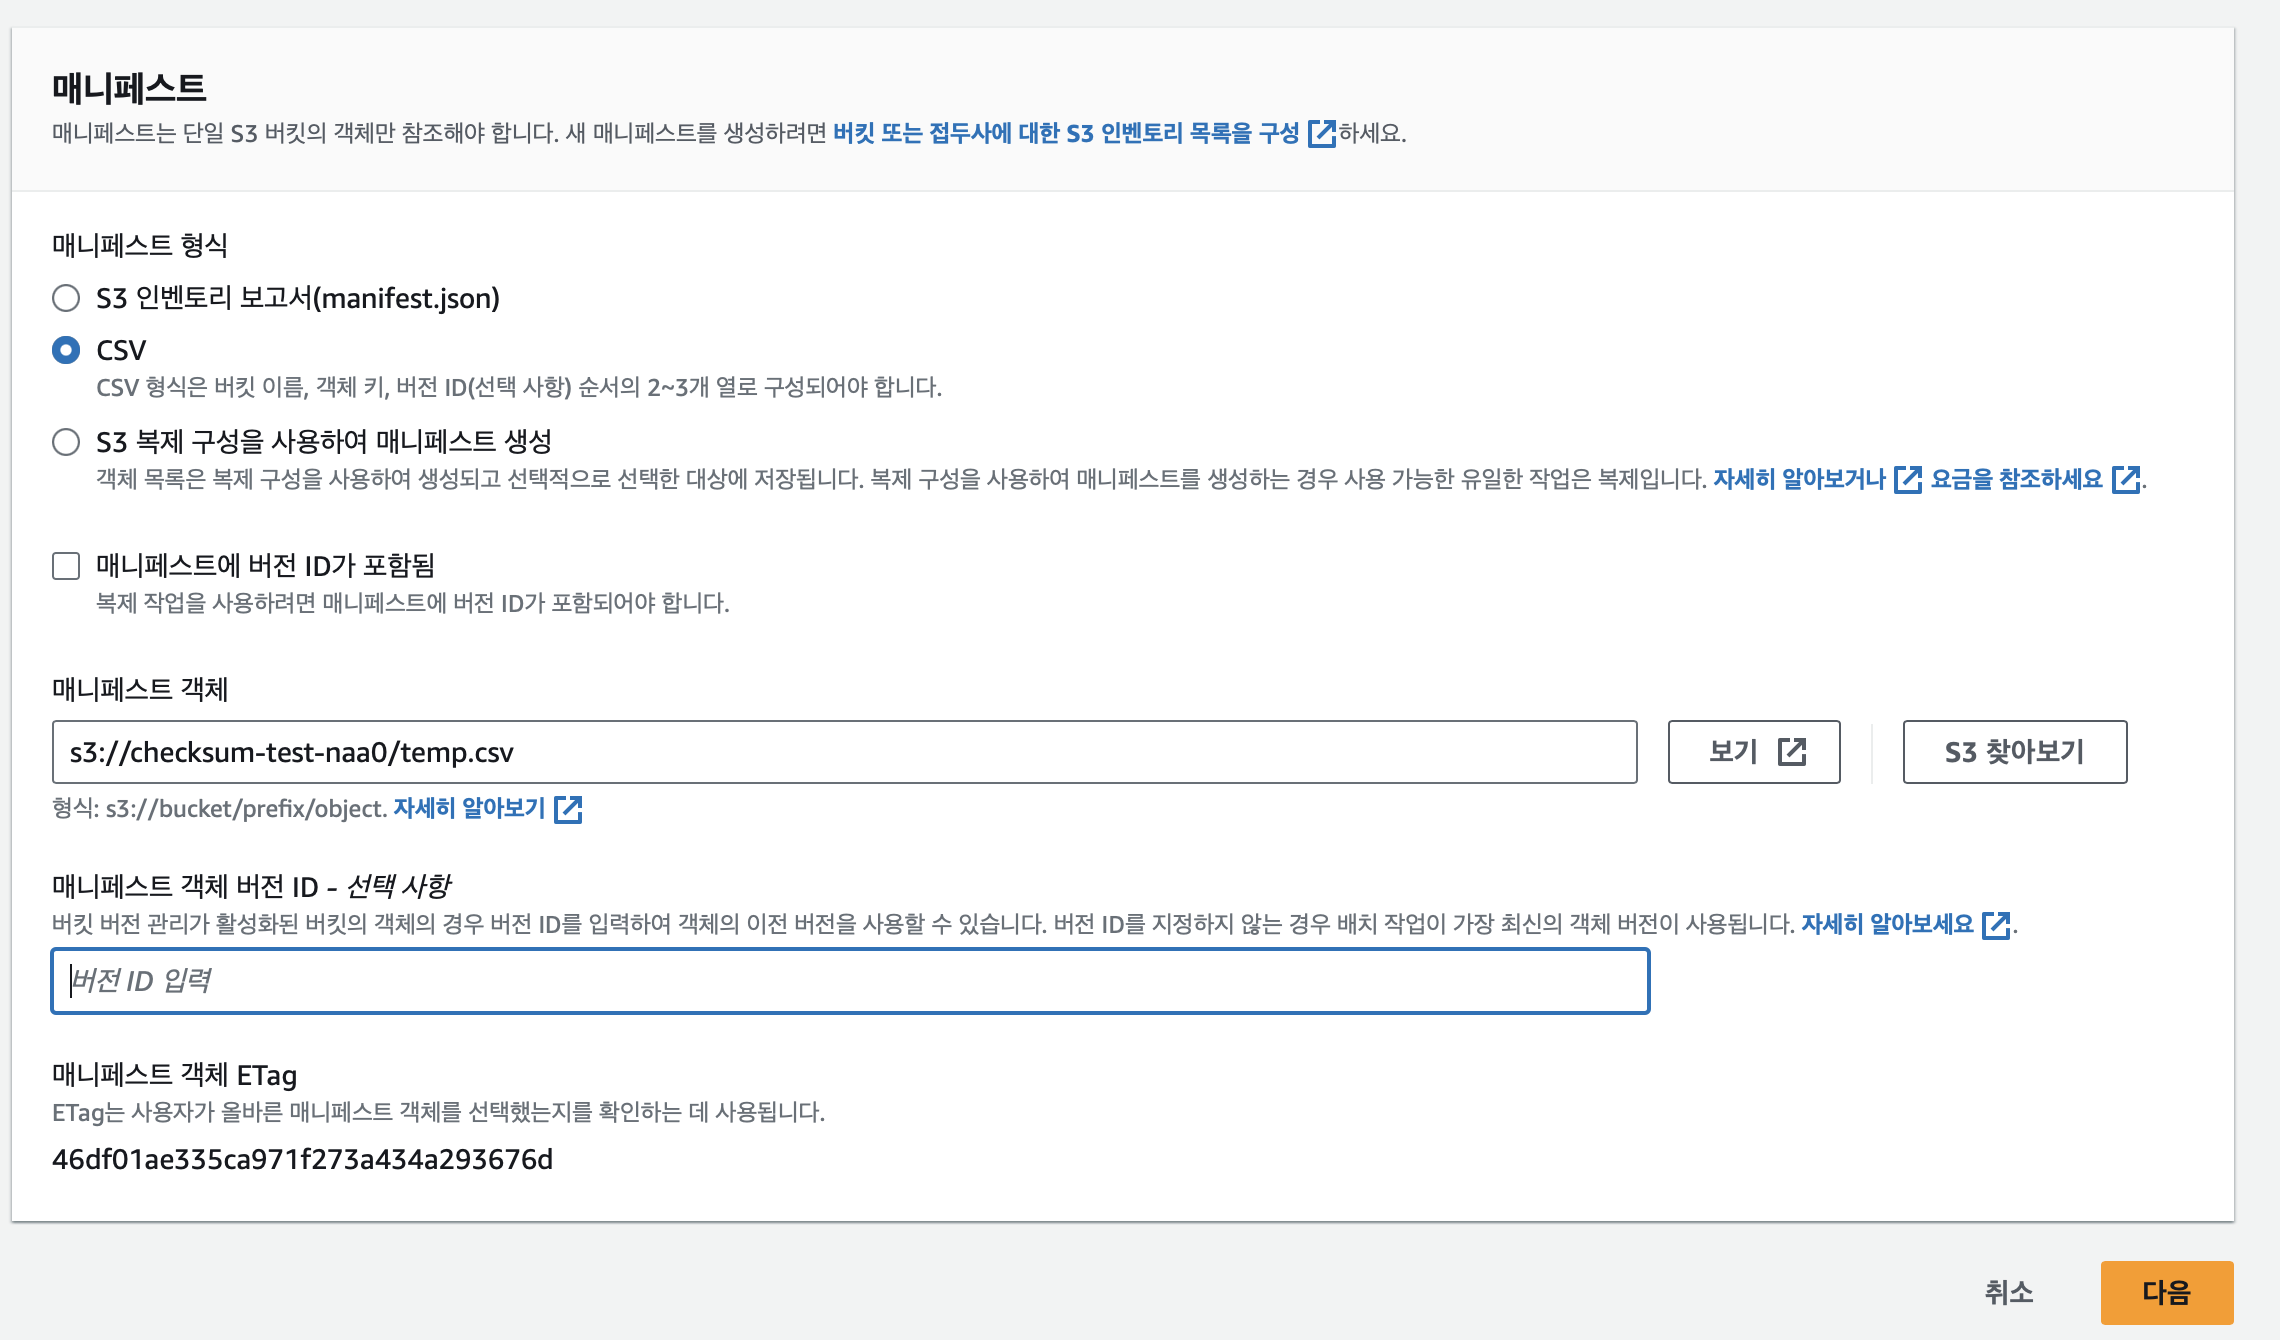
CSV 옵션 선택 후, 업로드 했던 파일의 URI를 매니페스트 객체에 입력해 줍니다.
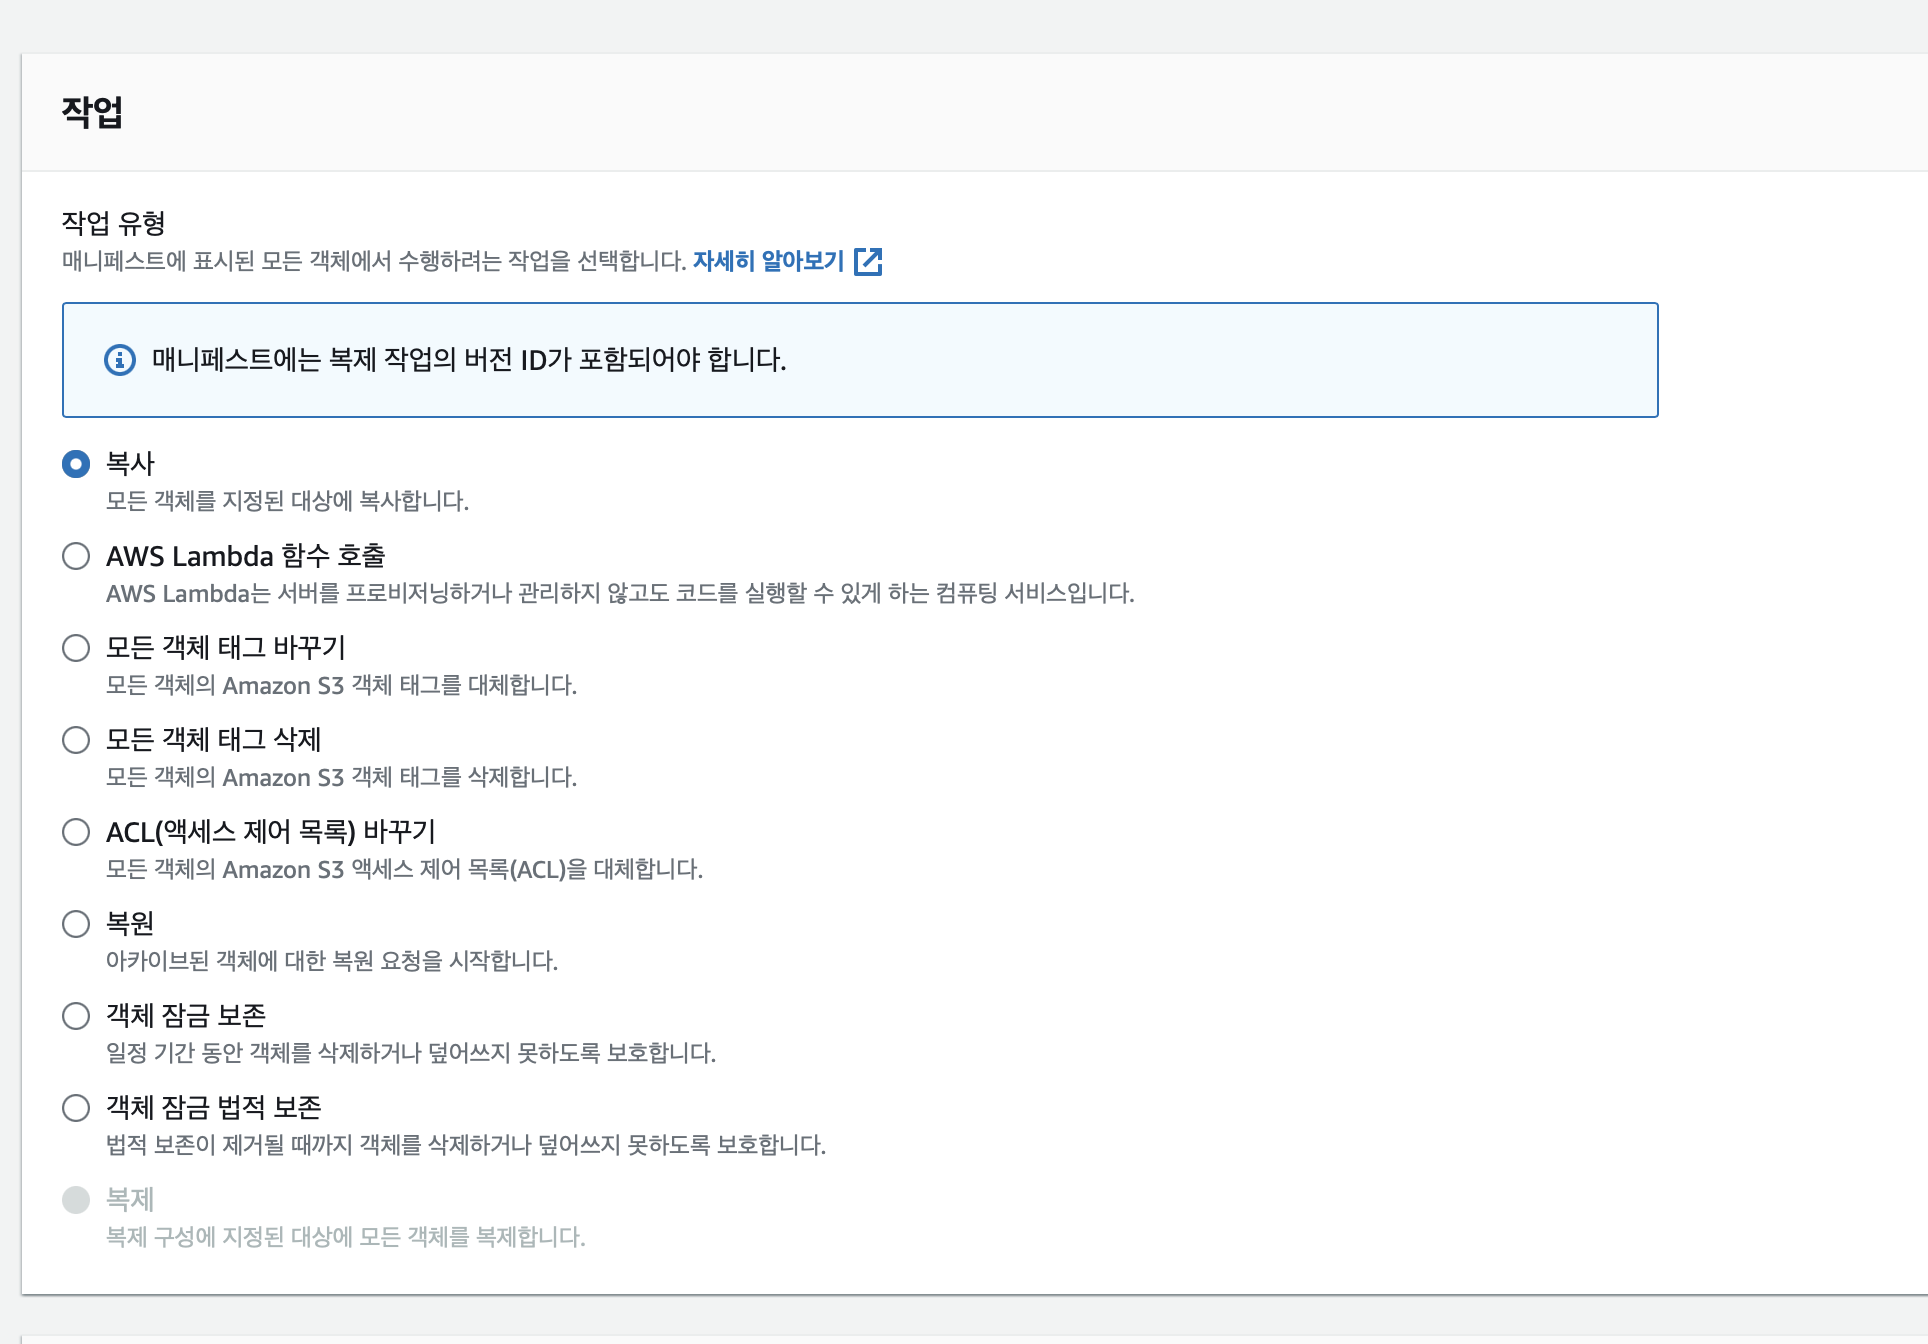
작업은 복사를 클릭해줍니다.
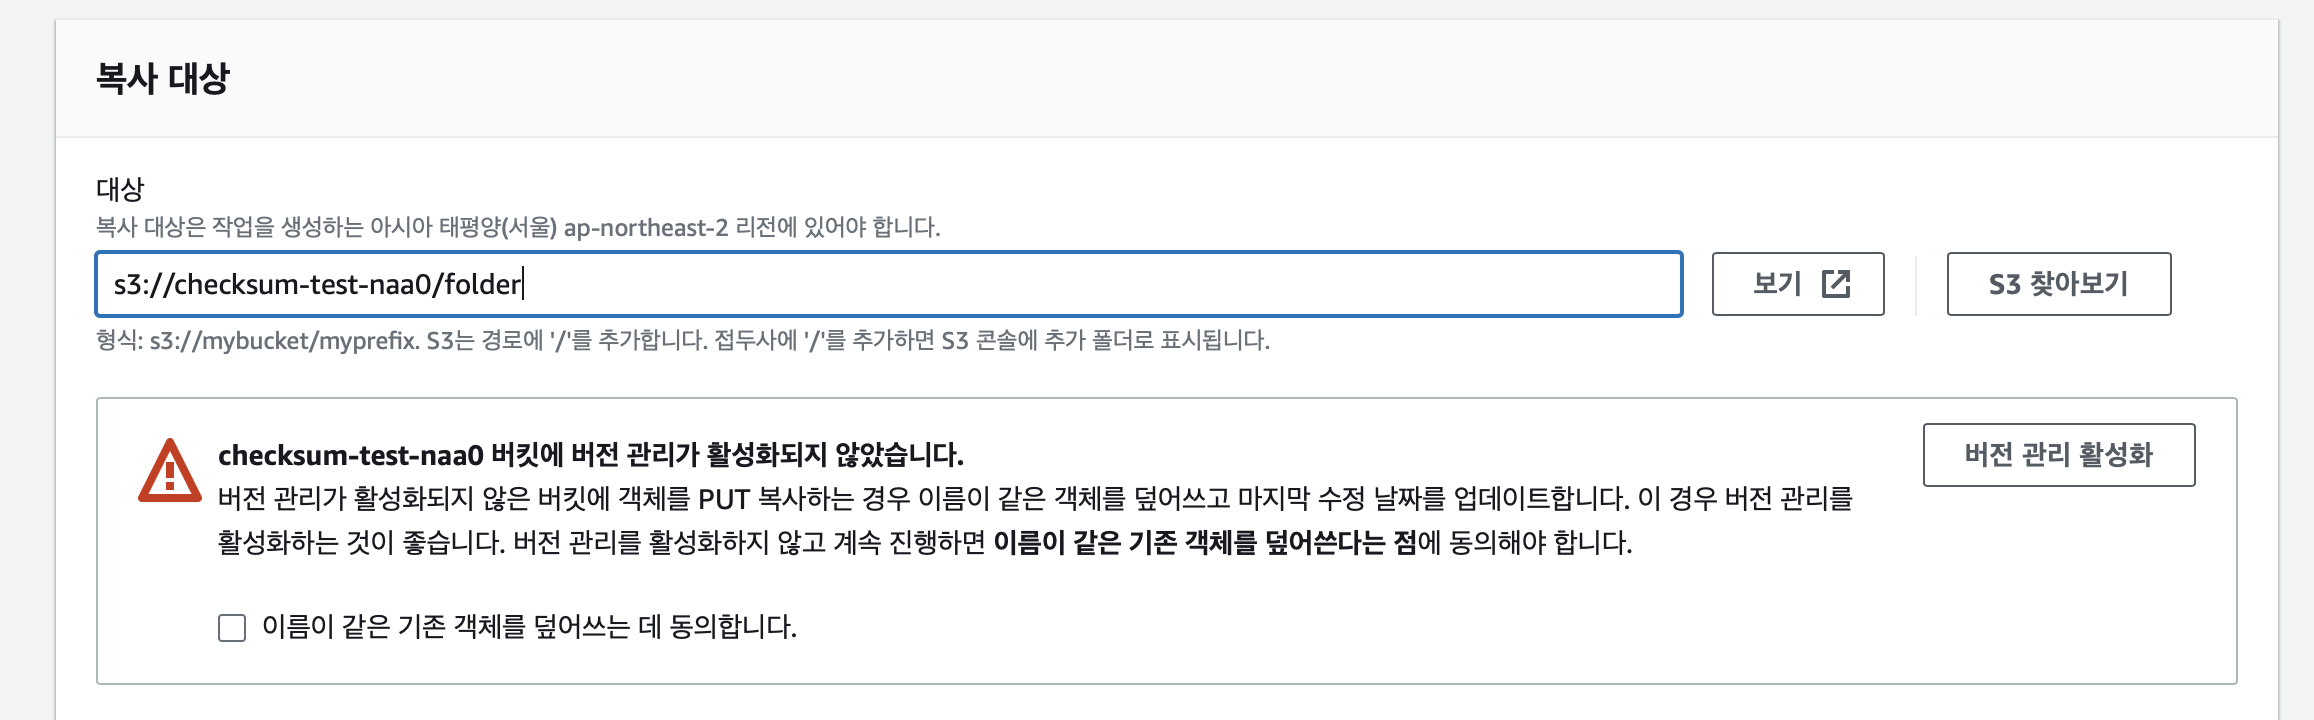
복사대상을 올바르게 입력해줍니다.
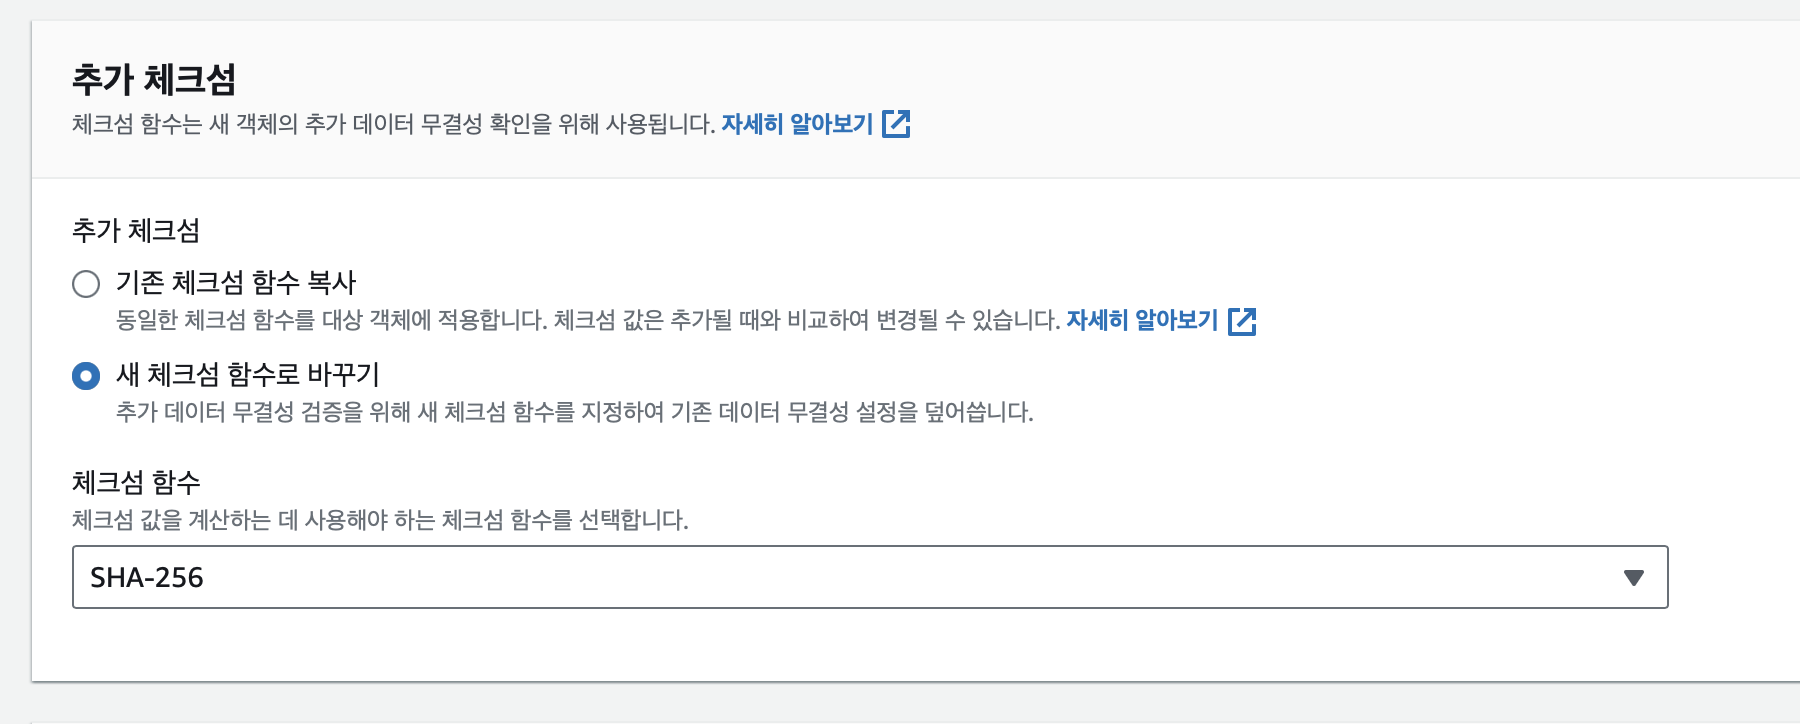
추가 체크섬을 설정해줍니다.
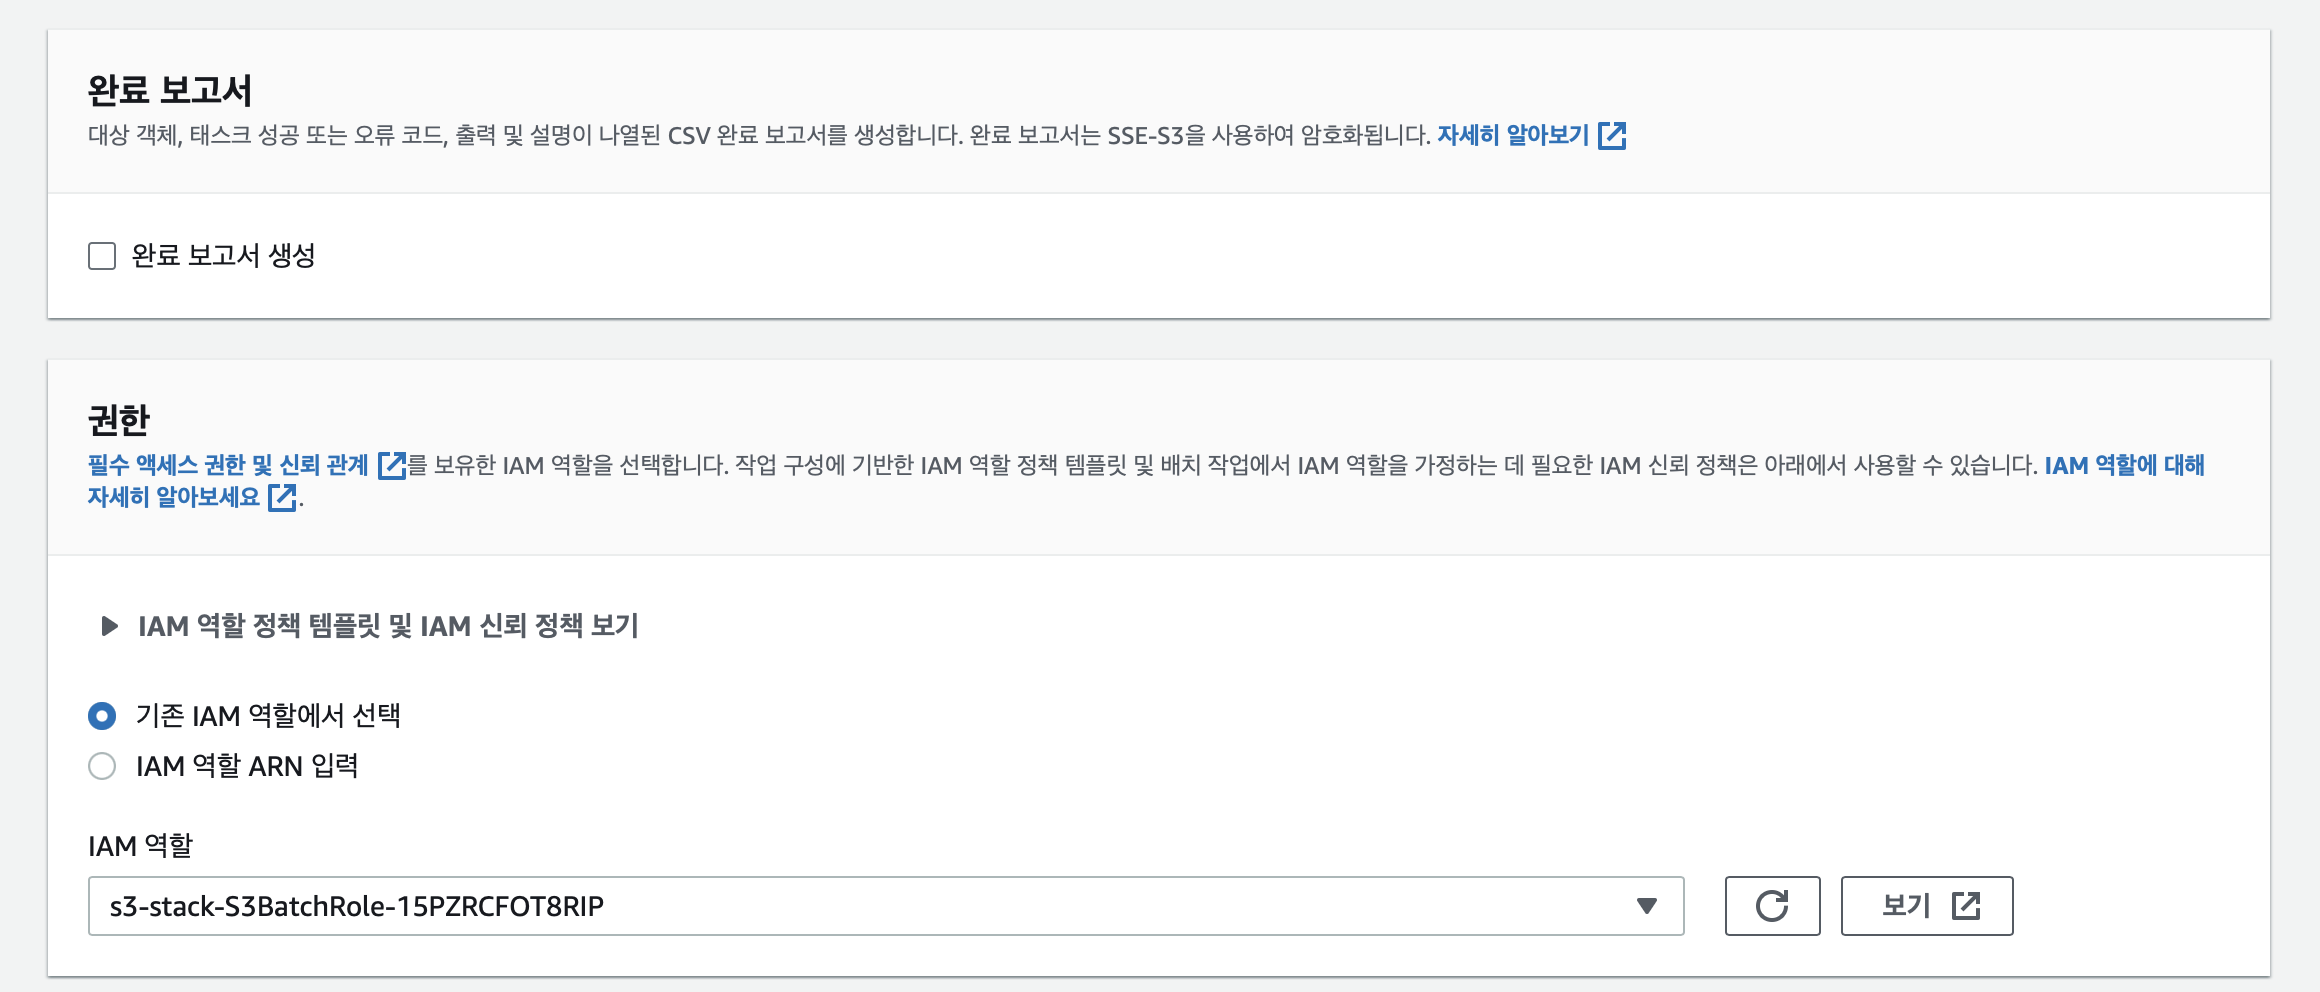
완료보고서는 생성하지 않고, IAM 역할은 S3BatchRole 이 포함된 역할로 선택해줍니다.
이후 생성된 batch job을 실행시켜주면 추가 체크섬이 활성화 됩니다.
'DevOps > 🐝 AWS' 카테고리의 다른 글
| [AWS ANS-C01 #2] ALB, NLB / X-Forwarded-For / IP 보존 (0) | 2024.03.19 |
|---|---|
| [AWS ANS] Listener 규칙 – Host header (호스트 조건) / Path (경로 조건) 차이 (0) | 2024.03.19 |
| [AWS ANS-C01 #1] ALB, NLB / 로드밸런서 컨트롤러 설치 vs 대상그룹 만들어서 Auto Scaling / TLS 종료 (0) | 2024.03.19 |
| [AWS Network] VPC Peering과 Transit Gateway 차이 (0) | 2023.07.01 |
| [AWS JAM - DB] DML(update) 작동시키는 사람 cloud insights로 찾기 (AUDIT USER ACTIVITY) (1) | 2023.02.03 |